
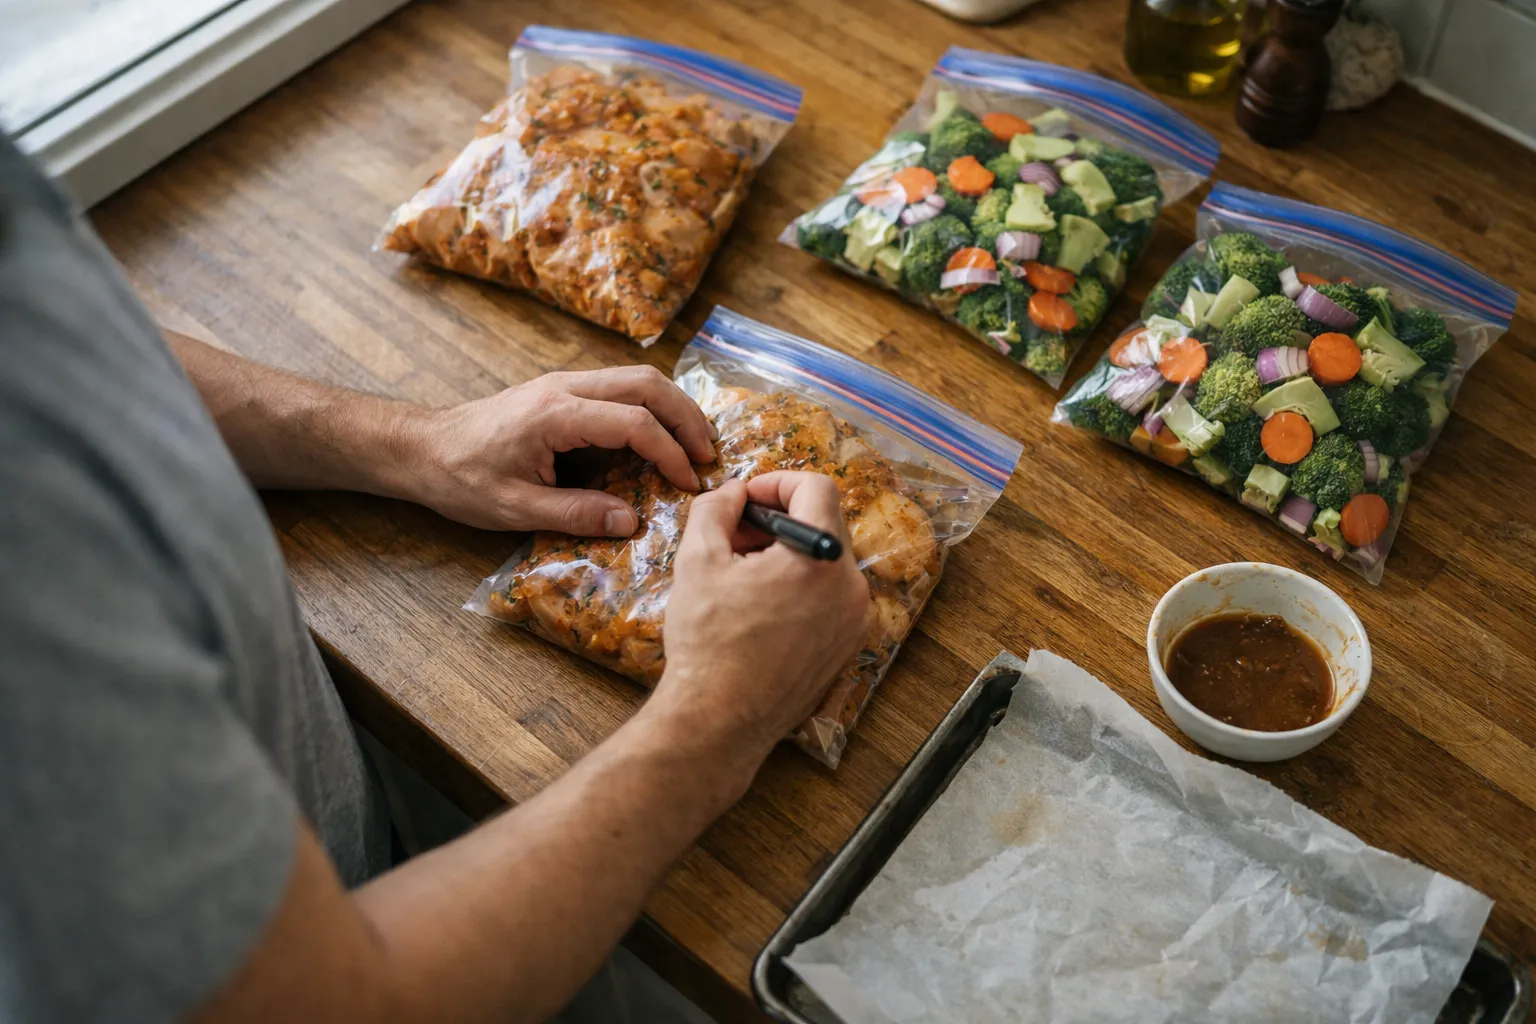
What you’ll learn: how to set up a repeatable freezer-to-oven dinner kit system that yields dependable, restaurant-quality weeknight dinners you can bake straight from frozen in ~30 minutes. This guide is for home cooks who want convenience without compromising texture, flavor, or sustainability.
Who this is for: recipe enthusiasts, busy households, cooks who prep ahead, and anyone using a conventional, convection, or smart oven. If you have a countertop convection/air‑fryer oven, vacuum sealer, or want to cut food waste and grocery trips, this will make your weeknights calmer and tastier.
Why this matters in June 2026: The core principle is the same as when my grandmother taught me—have seasoned components ready in the freezer—but tools and priorities have shifted. Smart ovens with “frozen” presets, wider adoption of home vacuum sealing, and stronger attention to packaging and food-waste reduction mean you can make better make‑ahead meals than ever without extra effort. This update adds practical steps for smart-oven settings, vacuum-sealing pitfalls, and sustainability-minded packaging so your kits are reliable and responsible.
Prerequisites & context: what makes a dinner kit actually work
Freezer-to-oven kits aren't simply frozen leftovers. The goal is to freeze raw or par‑cooked components in a format that cooks evenly from frozen and keeps texture. Before you start, remember these baselines:
- Best candidates: proteins that tolerate direct heat (bone-in or boneless chicken thighs, pork medallions, sausages), hearty fish fillets, tofu, legumes, and sturdy vegetables (carrots, broccoli, Brussels sprouts).
- Skip or handle carefully: high-water produce (cucumber, lettuce), delicate herbs (add at service), and thin cream sauces (add or finish with dairy after baking).
- Food-safety baseline: Follow USDA Food Safety and Inspection Service (FSIS) endpoint temperatures: 165°F (74°C) for poultry; 145°F (63°C) for fin-fish with a 3-minute rest; use a calibrated probe thermometer when in doubt.
- Appliance context: Convection and countertop air‑fryer ovens are common in 2026 kitchens. They shorten cook times and increase browning—adjust temps and check earlier (guidance below). Smart ovens may offer “cook from frozen” or probe-assisted programs; treat these as starting points and confirm with your thermometer.
Helpful equipment (not mandatory): quart-size freezer bags or high-quality reusable silicone bags; baking sheets; parchment or foil; a permanent marker; a probe thermometer; kitchen scale for consistent portions; optional vacuum sealer (see packaging caveats below).
Why these matter: Packaging, cut size, and moisture control are the difference between a crisp, caramelized dinner and a watery casserole. The rest is technique and timing.
Step 1: Choose a “kit style” by cooking method
Match the kit to how you want the food to behave in the oven. If you have a smart oven with frozen presets, use them for timing cues—but always verify internal temps and visual cues below.
Option A: Sheet‑pan kits (best for crisp edges)
Great for: chicken thighs, sausages, tofu cubes, root vegetables, broccoli, cauliflower.
Why it works: High heat gives caramelization even from frozen. For convection ovens, reduce temperature by ~20–25°F (10–15°C) or check 10–15 minutes earlier.
Option B: Foil packet kits (best for gentle steaming)
Great for: fish fillets, shrimp, asparagus, green beans, citrus-herb profiles.
Why it works: The packet traps steam and protects delicate items from drying out. Always use a rimmed sheet pan underneath to catch drips and avoid oven messes.
Option C: Casserole-style “dump-and-bake” kits (best for forgiving textures)
Great for: enchilada bakes, baked pasta (assemble with sauce but add cheese after baking), curries made with sturdy starches (add coconut milk after).
Why it works: Saucy components reheat evenly; texture tolerates a wider range of moisture changes.
My advice: Start with sheet-pan kits—the most predictable and forgiving while you learn how your own oven handles frozen loads.
Step 2: Build your kit with a simple formula (ingredients + ratios)
I use a template in my kitchen that’s repeatable and forgiving. Scale it and write the cook method on each label so tired nights are simple.
- Protein: 4–6 oz (110–170 g) per person. For plant-forward meals, use 1 cup cooked legumes or 4–6 oz pressed tofu per person.
- Vegetables: 1½–2 cups per person. Choose vegetables with similar cook times or cut them to coordinate.
- Sauce/seasoning: 2–3 Tbsp per person of a thick paste or concentrated sauce (enough to coat pieces). Paste-like sauces freeze and caramelize better than thin broths.
- Starch (optional): Keep separate—cook fresh—or use par-baked breads or sturdy items saved for service.
Example for 4 servings: ~1½ lb chicken thighs + 6–8 cups mixed veg + ½–¾ cup thick sauce.
Ingredients that freeze well: aromatics (minced garlic, grated ginger), intensely flavored pastes (tomato, miso, harissa), and concentrated spice blends. Bright acidic components—lemon juice, vinegars—are best added after baking for freshness.
What it should look like: Lightly coated pieces with no large pools of thin sauce—this prevents sogginess and uneven cooking.
Step 3: Prep — cut size, moisture control, and seasoning
Prep is the work that pays dividends. A few small steps prevent the usual pitfalls.
- Cut slightly larger than you think. Frozen veg softens; 1-inch florets, thick half‑moons, or chunky wedges hold up better. If a piece is thin, it will overbrown or dry before the rest cooks.
- Dry before freezing. Pat proteins and washed veg until surface moisture is gone. Less surface water = fewer ice crystals and better browning.
- Salt smartly. Salt draws moisture. For watery veg (zucchini, mushrooms), salt lightly or omit and finish with salt after baking.
- Oil intentionally. 1–2 Tbsp of oil per sheet-pan kit helps brown and reduces sticking; too much makes a stewed texture. Use an oil with a high smoke point if you’ll bake at 425°F (neutral or light olive oil).
- Mix sauce with the protein first. Sauces cling better to protein than veg; coating protein ensures even seasoning.
Don’t skip this step: a properly dried and evenly coated kit will give you those crisp, caramelized edges that make a frozen prep feel like a fresh meal. I learned this pressing tofu day after day with my grandmother—drying is non-negotiable.
Step 4: Package like a pro (labels, flat-freezing, and portions)
Organization saves time during prep and at mealtime. In 2026, many cooks pair reusable bags with clear labels and optional vacuum sealing. A few rules:
- Label before filling. Include name, date, servings, and oven method and time. Example: “Harissa Chicken — 4 serv — Sheet pan 425°F, 20 + 15.” Writing the two-stage time removes decision fatigue.
- Freeze flat. Lay bags flat on a sheet pan to freeze thin and stackable—faster freezing preserves texture.
- Keep finishers separate. Pack cheese, herbs, citrus wedges, or crunchy toppings separately in small bags, or note them on the label.
- Portion smartly. Make 1–2 serving kits for households with variable appetites to reduce waste.
Vacuum sealing notes: Vacuum sealing reduces freezer burn and extends peak quality, but be mindful: sealing very wet or thick-sauced kits can compress ingredients and prevent airflow that aids crisping. Flash-freeze items on a tray for 1–2 hours before vacuum sealing if you plan to seal them—this helps maintain shape. Aim to use most kits within 3 months for best texture; vacuum-sealed packs can remain acceptable longer but still benefit from rotation.
Step 5: Cook from frozen with predictable timing and real cues
Cook times change by oven, pan, and thickness. Here are ranges and sensory cues so you know when dinner is done.
Sheet-pan kit: “high heat, stir once”
- Conventional oven: Preheat to 425°F (220°C). For best crust, preheat an empty rimmed sheet pan on the middle rack and transfer frozen pieces onto it carefully.
- Spread frozen contents on a lined, rimmed sheet pan in a single layer. Don’t crowd.
- Bake 20 minutes. Stir/flip, then bake another 10–20 minutes until edges are browned and the thickest protein reaches safe temperature.
Cues: Sizzling edges, toasty aroma, and sauce that clings rather than forms watery pools.
Convection / smart oven adjustments
Use your oven’s frozen-preset as a starting point. Reduce the conventional temp by ~20–25°F (10–15°C) and check 8–12 minutes earlier. If your oven links to a probe, set it to the target internal temperature and still inspect for color and sauce behavior—probe alerts can be conservative or optimistic depending on placement.
Foil packet kit: sealed steam method
- Conventional oven: 400°F (205°C); convection 375°F (190°C).
- Bake 20–35 minutes from frozen depending on thickness; open carefully and finish 3–5 minutes uncovered to take off steam and get a little browning.
Casserole-style kit: covered then uncovered
- Preheat to 375°F (190°C).
- Bake covered 45–60 minutes from fully frozen; uncover and bake 10–20 minutes to reduce sauce and brown the top.
Food safety: Use a thermometer when in doubt and follow USDA FSIS endpoint temps. For poultry aim for 165°F; for fish 145°F with a 3‑minute rest. If a smart oven shows completion before you reach these temps, continue until the probe reads safely.
Step 6: Dietary modifications without rewriting the plan
This system is flexible: swap proteins or sauces without changing the method.
- Gluten-free: Use tamari, check spice-blend labels, and serve over rice or roasted potatoes instead of pasta.
- Dairy-free: Avoid freezing cream-based sauces—add coconut milk or cashew cream after baking, or finish with olive oil and lemon.
- Vegetarian/vegan: Swap firm tofu (pressed and diced) or canned chickpeas for protein. For texture, roast chickpeas briefly before coating; pack crunchy seeds separately for service.
- Low-sodium: Cut salty condiments and boost flavors with acids (vinegar, lemon) and aromatics.
Pro tip: For mixed-diet households, freeze a neutral vegetable base and keep proteins in separate bags. Same sheet pan, different corners—everybody gets what they want.
Three updated freezer-to-oven dinner kit examples (copy-and-freeze)
1) Miso-Maple Tofu & Broccoli Sheet-Pan Kit (plant-forward)
- Ingredients (2–4 servings): 1 lb extra-firm tofu (pressed, cubed); 4 cups broccoli florets; 1 red bell pepper, sliced; 3 Tbsp white miso; 2 Tbsp maple syrup; 1 Tbsp tamari; 1 Tbsp sesame oil. Pack sliced scallions, sesame seeds, and a splash of rice vinegar separately.
- Prep: Toss tofu with miso-maple paste, fold in vegetables; freeze flat on a tray for 1–2 hours, then transfer to labeled bag.
- Cook: 425°F conventional: 20 + 12 minutes, stir once. Convection: 400°F and check 8–10 minutes sooner.
- Finish: Squeeze rice vinegar, scatter scallions and sesame seeds.
2) Lemon-Fennel Cod Foil Packet (light & bright)
- Ingredients (2 servings): 2 cod or pollock fillets; 2 cups cherry tomatoes; 1 fennel bulb thinly sliced; 2 Tbsp olive oil; 1 tsp fennel pollen or ground fennel; zest of 1 lemon (juice after). Pack parsley and lemon wedges separately.
- Prep: Layer veg and cod, drizzle with oil-pollen mix; seal in foil; freeze flat.
- Cook: 400°F, 22–30 minutes from frozen. Open and finish 3–5 minutes for color.
- Finish: Add fresh parsley and juice of lemon.
3) Charred Poblano & Black-Bean Enchilada Bake (vegan, freezer-friendly)
- Ingredients (4 servings): 2 cups roasted poblanos or bell peppers; 2 cups black beans (drained); 2 cups enchilada sauce (thicker paste-style); 8 corn tortillas (par-baked or left separate); 1 cup frozen corn; spices: cumin, smoked paprika.
- Prep: Layer beans, peppers, sauce in a casserole dish; freeze covered (pack tortillas separately to add fresh).
- Cook: From frozen, 375°F covered 45–55 minutes; uncover and bake 10–15 minutes to reduce sauce.
- Finish: Top with cilantro, lime, and toasted pepitas.
Common mistakes (and how to avoid them)
- Overcrowding the pan. Split into two pans to prevent steaming—space is flavor.
- Freezing wet produce. Pat dry; ice crystals become puddles in the oven and kill texture.
- Skipping labels. Include oven method and two-stage timing to avoid guesswork on tired nights.
- Adding dairy before freezing. Freeze cheese separately or add after baking to maintain texture.
- Vacuum sealing wet mixtures. Flash-freeze on a tray first, then seal—this preserves shape and prevents compressing delicate vegetables.
Pro tips for restaurant-quality results
- Always have a finisher. Acid (lemon), fresh herbs, crunchy nuts, or a drizzle of good oil transforms reheated food into something lively.
- Preheat a sheet pan for quicker sear. An oven-hot pan gives a better crust. Transfer carefully—use an oven mitt and steady hand.
- Keep sauces thick. Paste-based marinades cling and caramelize. Thin sauces steam ingredients.
- Write two times on the label. Example: “425°F 20 + 15” removes decision fatigue on weeknights.
- Batch one flavor family per prep day. It’s kinder to your spice rack and helps you reuse components across multiple meals.
Common-sense sustainability notes
I try to cut single-use plastic and food waste in my kitchen. Use reusable silicone bags, compost trimmings, and plan portions to avoid leftovers languishing in the back of the freezer. If you vacuum-seal, reuse vacuum bags when safe to do so and follow manufacturer guidance. Small swaps save money and reduce waste over time.
FAQ
Do I need to thaw freezer-to-oven kits first?
Not usually. This system is designed to cook from frozen so textures remain firmer and you avoid watery results. If a recipe specifically calls for a short thaw (for example, thick gnocchi), follow the label; otherwise bake from frozen and use the timing cues and thermometer guidance above.
How long do these dinner kits keep in the freezer?
For peak quality, use most kits within 3 months. Many items remain safe longer (4–6 months) especially if vacuum-sealed, but flavor and texture are best within the first few months. Always label with date and contents and rotate older packs to the front.
My kit turned watery—what went wrong?
Typical causes: too-wet ingredients, overcrowding, or a thin sauce. Pat produce and proteins dry, spread items in a single layer, thicken sauces (tomato paste, miso, or a touch of starch) when assembling, and avoid freezing watery vegetables as the main component.
Can I use an air fryer or toaster oven for these kits?
Yes. Convection-style air ovens brown quickly—reduce conventional temperatures by ~20–25°F (10–15°C) and check earlier. For small batches, start checking 8–12 minutes sooner than the conventional sheet‑pan time. Use a probe thermometer for proteins; small pieces can overcook rapidly in air fry mode.
Is vacuum sealing worth it?
Vacuum sealing reduces freezer burn and extends peak quality, especially for long-term storage or bulk buys. It's not required for short-term kits (1–3 months). If you vacuum seal, flash-freeze wet or shaped items first so they keep their form and crisp on baking.
If you’d like, tell me your household size, favorite proteins, and any dietary needs—I’ll map out three label-ready kits and a single shopping list so you can prep them in one session. I’ll even include oven times tailored to a conventional and a convection countertop oven.
—Maria Santos, Food & Recipe Editor. I still think of my grandmother every time I press tofu and pat a tray dry: those small, patient steps are the secret to turning freezer prep into weeknight joy.