
By Dr. Emily Torres, Health & Wellness Correspondent
What You'll Learn
- Exactly how to prep, coat, and air‑fry tofu so the crust stays crisp
- Which modern air‑fryer features (2026) matter and how to adjust settings
- Evidence‑informed tips on freeze‑thaw, oil/starch order, and reheating
- Troubleshooting common problems and safe-sodium strategies
What You'll Need
- Ingredients (base batch):
- 1 block extra‑firm or super‑firm tofu (14–16 oz / 400–450 g)
- 1 tbsp low‑sodium soy sauce or tamari (use tamari for gluten‑free)
- 1 tbsp neutral oil (avocado, grapeseed, or light olive oil) or an oil mister
- 2–3 tbsp starch (corn, potato, or tapioca)
- Optional: 1/2 tsp garlic powder, 1/2 tsp smoked paprika, pinch black pepper, flaky salt to finish
- Tools: countertop air fryer (see notes on features), clean towel or paper towels, cutting board, sharp knife, mixing bowl, tongs, cooling rack
- Prep time: 10 minutes active + 15–30 minutes pressing (hands‑off); add overnight if freezing
- Cooking method: air‑frying at 375–400°F (190–205°C) depending on model and airflow
- Cook time: 12–20 minutes (depends on cube size and fryer power)
Why this update matters (Aug 2026)
Since 2022, manufacturers widely added stronger fans, humidity‑control, and app presets to countertop air fryers. Those features make timing more predictable, but the fundamentals still win: remove surface moisture and maximize exposed edges. This 2026 update adds specific timing adjustments for high‑airflow units, advice for smart‑fryer presets, and an evidence‑backed reminder to manage sodium when using soy products (see sources below).
Step‑by‑Step Instructions
-
Pick the right tofu
Action: Use extra‑firm or super‑firm (vacuum‑packed) tofu. For a chewier, sauce‑absorbing interior, plan to freeze one block first (step 2).
Expected result: Extra‑firm tofu holds shape and crisps faster; frozen‑thawed tofu becomes spongier and darker after pressing and soaks sauces better.
-
Press (or freeze‑thaw) the tofu
Action A — Press: Drain, wrap in a clean towel, set a plate and 2–3 lb weight atop for 20–30 minutes. Pat dry before cutting.
Action B — Freeze‑thaw (optional): Freeze the unopened block overnight (or at least 12 hours), thaw fully in the fridge, then press 10–15 minutes and pat dry. Many chefs and test kitchens use this to increase porosity and chew.
Expected result: Pressed tofu looks matte; frozen‑thawed tofu will be darker and feel more porous.
-
Cut for maximum crisp
Action: Cut into uniform 3/4‑inch (2 cm) cubes for balanced crisping, or 1/2‑inch planks for faster, thinner crusts.
Expected result: Uniform pieces cook evenly; smaller pieces have more edge‑to‑surface ratio and crisp quicker.
-
Season, oil, then coat (the order matters)
Action: Toss tofu gently with 1 tbsp soy/tamari and 1 tbsp oil so each piece is evenly moistened but not dripping. Gradually sprinkle 2–3 tbsp starch while lightly tossing until pieces are evenly dusted.
Why it works: Oil promotes Maillard reactions and even browning; a lightly oily surface lets starch form a uniform crust rather than gummy patches. This technique aligns with repeatable test‑kitchen practice (see America's Test Kitchen, Serious Eats).
Alternative: Mix 1:1 rice flour and tapioca for a lighter, crispier shell.
-
Preheat the air fryer
Action: Preheat to 375–400°F (190–205°C) for 3–5 minutes. If your fryer has a "crisp" preset or humidity control, select the crisp/low‑humidity option.
Expected result: Immediate surface browning reduces steaming and helps the crust set fast.
-
Arrange with space
Action: Place tofu in a single layer with visible gaps; if your model has a perforated tray, orient pieces so airflow can reach all sides. Cook in batches rather than crowding.
Expected result: Proper airflow yields consistent browning; overcrowding traps moisture and makes pieces soggy.
-
Air‑fry and finish
Action: Cook at 375–400°F for 12–18 minutes depending on size and model. Shake or flip at 6–9 minutes. For high‑airflow or "power" units, check 2–3 minutes earlier than usual; low‑power units may need +2 minutes.
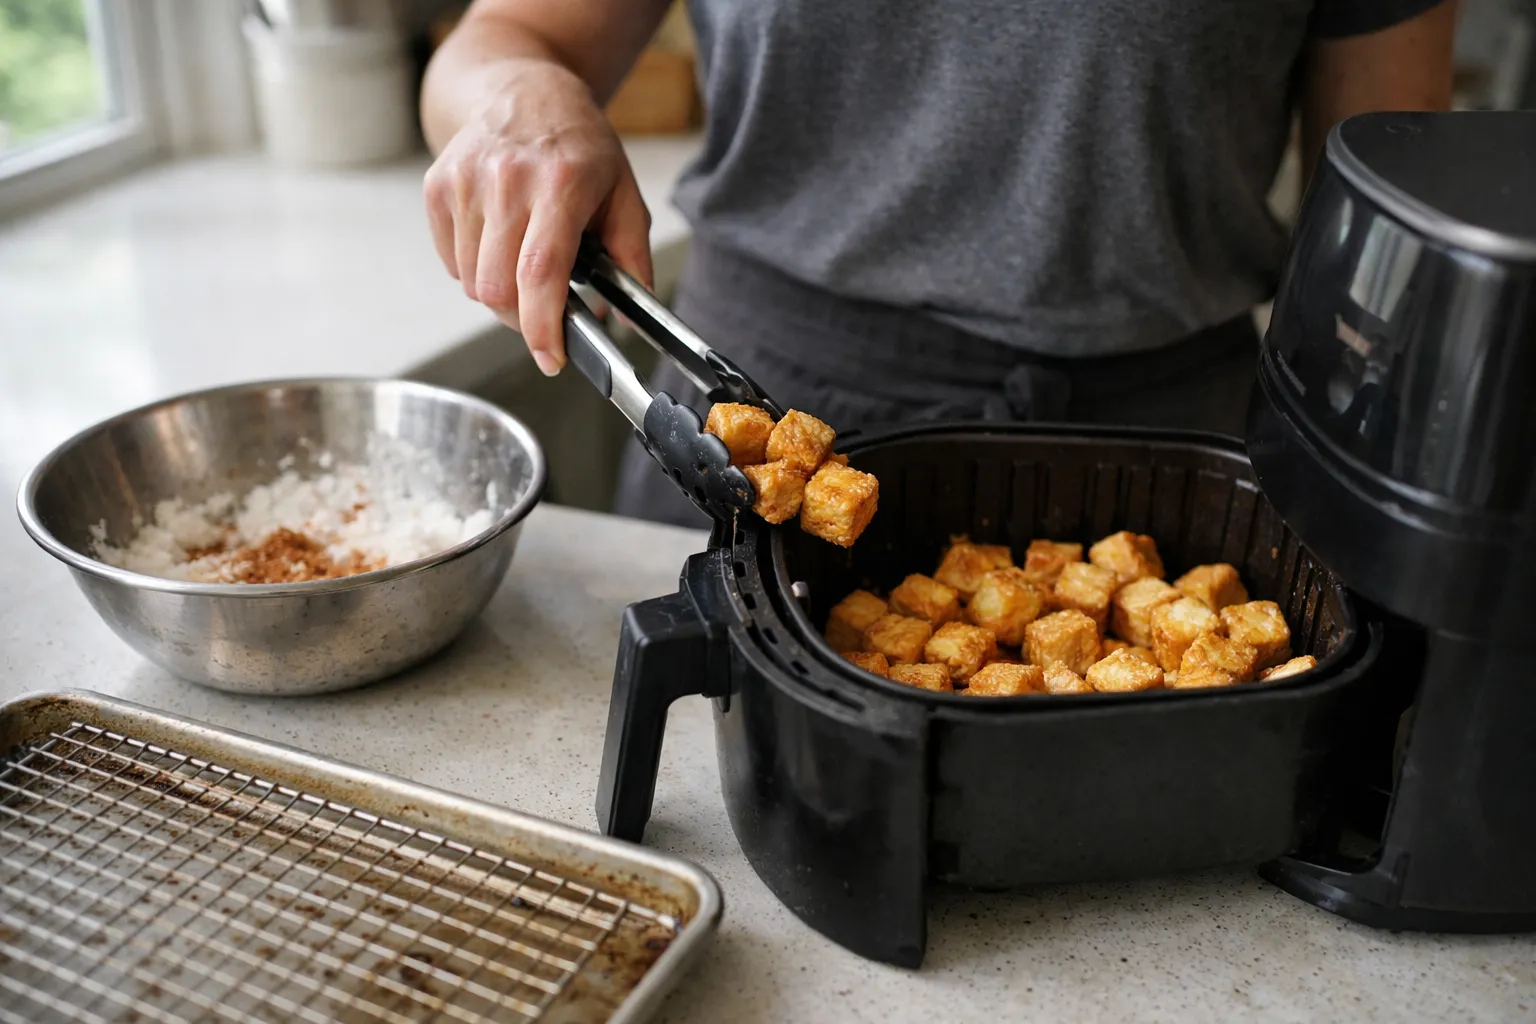
Expected result: Golden, blistered spots and a dry‑feeling crust. Tap a piece—the sound should be firm rather than soggy.
-
Rest briefly, then sauce carefully
Action: Transfer to a cooling rack and rest 1–2 minutes to let steam escape. Serve sauce on the side or toss lightly just before eating to preserve crunch.
Expected result: Resting sets the crust. Heavy saucing will soften it quickly.
Screenshots/Visual Cues (What You Should See)
- After pressing: matte surface; towel with damp patches
- After coating: pieces look evenly dusted—no shiny puddles
- Halfway through: edges look dry and beginning to brown
- Finished: golden to deep‑gold edges, blistered spots, coating feels dry to touch
Troubleshooting
My tofu is soggy
- Press longer (20–30 minutes) or use super‑firm tofu.
- Preheat next time; avoid adding too much liquid seasoning—1 tbsp soy per block is usually enough.
- Don't overcrowd; cook in batches to ensure airflow.
The starch looks gummy
- Make sure oil and seasoning are evenly distributed before adding starch; sprinkle starch gradually while tossing.
- Pat tofu thoroughly after pressing—surface moisture causes gumming.
It crisps, then goes soft after saucing
- Serve sauce at the table or drizzle just before eating. For stickier glazes, briefly re‑air‑fry 1–2 minutes after saucing and serve immediately.
Updated best practices and safety notes
Use an oil mister or brush instead of aerosol cooking sprays to avoid propellant residue and uneven coating. Many 2024–2026 fryers include humidity sensors and crisp presets—select low‑humidity/crisp settings when available. If you have hypertension or are watching sodium, choose low‑sodium tamari and flavor with acid (lime, rice vinegar) and aromatics; the American Heart Association recommends limiting sodium to 2,300 mg/day for most adults.
Disclaimer: This article is a cooking tutorial, not medical advice. If you have food allergies (including soy) or specific medical dietary needs, consult your healthcare provider or a registered dietitian before making changes.
Next Steps
- Make a bowl: serve over warm rice or greens with avocado, quick cucumber salad, and a peanut or tahini drizzle.
- Meal prep: cool tofu uncovered 10 minutes, store in a shallow container with a paper towel to absorb steam, re‑crisp 3–5 minutes at 375°F before serving.
- Experiment: freeze one block to test texture differences; note whether your household prefers chewier, sauce‑soaking pieces.
Sources & Expert Notes
Techniques here reflect repeatable kitchen testing from culinary outlets such as America's Test Kitchen and Serious Eats (J. Kenji López‑Alt), and standard food‑science explanations for freeze‑thaw texture changes. For sodium guidance see American Heart Association recommendations on salt intake. If you want deep technical reading on tofu microstructure after freezing, search peer‑reviewed food‑science journals for "tofu freeze thaw texture" to find laboratory studies. For personalized dietary questions, consult a registered dietitian.
FAQ
Can I make this with silken tofu?
No—silken and soft tofu have far more water and a fragile structure; they tend to break apart and steam rather than develop a crispy crust. Stick to extra‑firm or super‑firm tofu for air‑frying.
Is it healthier to skip the oil?
You can reduce or omit oil, but expect a paler, drier crust and possibly a longer cook time. If you're limiting fat, try an oil mister or use 1 tbsp oil and increase starch slightly; for medical dietary guidance, consult a clinician or dietitian.
How do I reheat leftovers without losing crunch?
Re‑crisp in the air fryer or convection toaster oven at 375°F (190°C) for 3–5 minutes. Avoid microwaving—microwaves steam and soften the crust.
Will freezing tofu always improve texture?
Freezing changes the cell structure—many people prefer the chewier, sauce‑absorbing result, but some prefer the firmer pressed texture of unfrozen tofu. Test both methods to see what your household prefers.
Can I use this method for gluten‑free diets?
Yes—use tamari labeled gluten‑free and confirm your starch (corn, potato, tapioca) is certified gluten‑free. Also verify any sauces or condiments are gluten‑free.