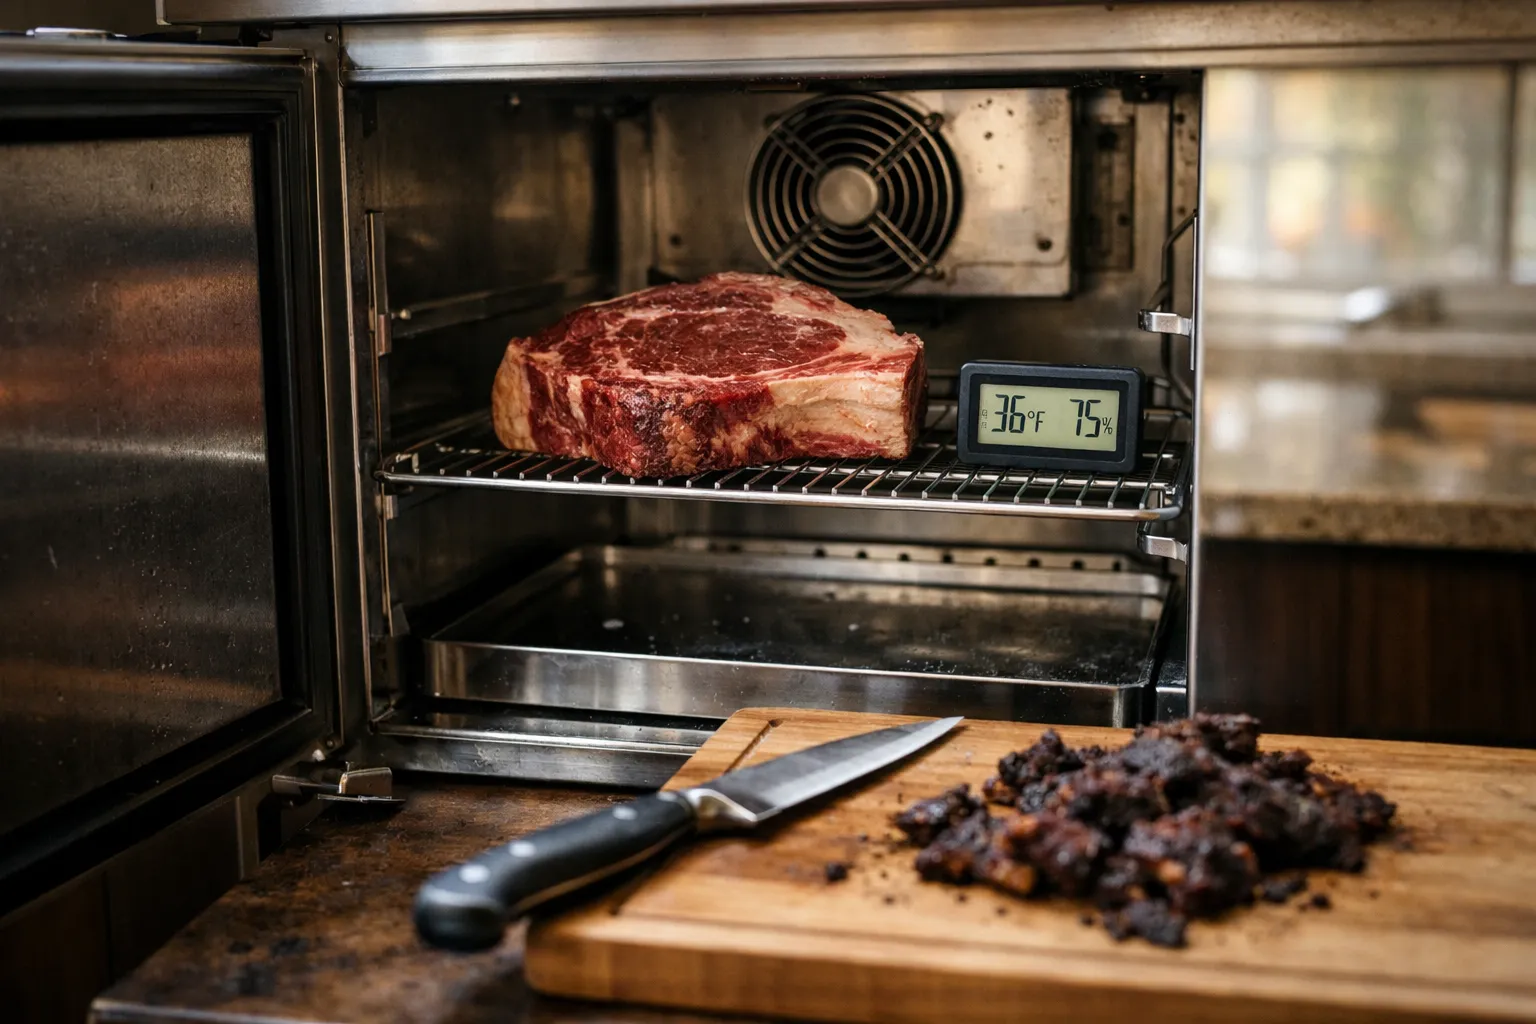
This updated September 2026 guide shows home cooks and food enthusiasts how to dry‑age whole subprimal beef cuts safely and predictably. You’ll get the precise setup and monitoring steps that produce steakhouse‑quality flavor, plus recent practical improvements in consumer equipment, modern best practices for trim and yield, and troubleshooting based on what home cooks and small-scale pros have learned through 2026.
Prerequisites / Who this guide is for
This guide is for experienced home cooks and food‑curious enthusiasts who want to dry‑age intact subprimal beef (bone‑in ribeye / whole rib, strip loin / short loin, porterhouse) in a dedicated environment. It is not for aging ground beef, individual steaks, or small boneless pieces. If you’re new to dry‑aging, start with one 5–8 lb bone‑in ribeye or a whole 10–12 lb strip loin to learn the process before scaling up.
Why dry‑age? What changes to expect
- Flavor concentration: Evaporation concentrates beef flavor; proteolysis (endogenous enzymes such as calpains and cathepsins) develops nutty, umami characteristics.
- Texture: Enzymatic breakdown of muscle proteins and connective tissue yields a perceptibly more tender bite.
- Appearance and yield: A dry, dark crust forms and is trimmed away; expect measurable weight loss and trim yields that increase with aging time.
Updated context and 2026 trends you should know
By late 2026 consumer adoption of dry‑aging at home has matured in two ways that affect your approach:
- Better consumer hardware: Purpose‑built countertop and undercounter units with integrated humidity control, gentle fans and food‑grade interiors are now widely available, making stable conditions easier without DIY hacks.
- Connected monitoring: Affordable data loggers and smart hygrometers (Wi‑Fi/BLE) with alerting are common; they let you see temp/RH trends and receive push alerts for excursions so you can intervene faster.
These changes reduce the “hands‑on” burden and lower the risk of avoidable mistakes, but basic food‑safety knowledge and disciplined hygiene remain essential.
Essential equipment and practical costs (current)
Key requirements are a dedicated space (never store other foods with your aging cuts) and reliable monitoring. Practical options in 2026:
- Dedicated refrigeration: Options range from retrofitted small upright or undercounter fridges to purpose‑built dry‑aging cabinets. Use a fridge dedicated only to aging. Purpose‑built countertop units reduce setup time and variability.
- Temperature control: Built‑in precise controllers on modern units or an external digital controller (±0.5°F) for retrofits.
- Hygrometer / data logger: A calibrated digital hygrometer and a data logger that records temp/RH at least hourly. Prefer units with remote alerts.
- Airflow: Small, low‑speed fans to ensure gentle circulation and even crust formation.
- Racks and trays: Stainless steel wire racks and drip trays; place probe sensors at meat level.
- Permeable dry‑aging bags (optional): Modern oxygen‑permeable bags allow enzymatic aging with reduced weight loss and cleaner surfaces — useful for small kitchens or shorter aging times.
- Sanitation tools: Food‑grade sanitizer, cutting boards, a sharp boning/trim knife and gloves for handling.
Target conditions: updated temperature, humidity and airflow
Precision matters. Small changes affect safety and flavor.
- Temperature: 34–36°F (1.0–2.0°C). Narrowing the range slightly from older guidance reduces bacterial risk while preserving enzyme activity. Avoid sustained excursions above 38°F (3.3°C).
- Relative humidity (RH): 75–82%. This range balances crust development with reasonable weight loss and reduces the risk of excessive surface hardening.
- Airflow: Gentle and consistent — the goal is slow, even drying. A low‑speed fan (one that moves only a few cubic feet per minute) positioned to circulate but not blast the meat is ideal.
Why these settings? Lower temp slows microbial growth; RH controls how quickly the surface desiccates. Together they produce a crust that protects the interior while enzymes slowly tenderize.
Before you begin: choosing and preparing the cut
- Cut selection: Choose whole subprimals with a good external fat cap and intact muscle structure: bone‑in rib primal, strip/short loin, or porterhouse/whole loin.
- Marbling / grade: Well‑marbled beef (USDA Choice/Prime equivalents) yields a more satisfying final texture and flavor because intramuscular fat retains mouthfeel during drying.
- Size matters: Aim for pieces ≥5 lb; larger pieces age more evenly and have a better edible‑to‑trim ratio.
- Minimal handling: Do not trim the outer fat cap aggressively prior to aging — it protects the meat. Pat lightly dry and place the whole cut on a rack with 360° air access.
Step‑by‑step dry‑aging process (updated for 2026)
- Set up and validate:
- Install racks, trays and your fan. Position the data logger/hygrometer at meat level and one additional sensor near the door to detect thermal gradients.
- Run the system empty for 48 hours to confirm stability in the 34–36°F and 75–82% RH window. If using an external controller or a purpose‑built unit, verify historical logs for 24–48 hours.
- Load the meat: Place the whole subprimal on the rack centered in the airflow path with clearance around it. Close the door and limit openings to daily or less to maintain stability.
- Daily/regular monitoring: Check remote logs at least once daily. Visually inspect without prolonged door openings. Log temp, RH and any sensory notes (surface color, odor, presence of growth).
- Adjust humidity if needed: Use a shallow pan of salted water or a small, controllable humidifier to raise RH; to lower RH reduce surface area of water or use a small desiccant pack in a sealed container within the unit. Modern units often control RH electronically — prefer that if available.
- Timing guidance (choose by taste):
- 7–14 days: Noticeable tenderness improvement; mild flavor concentration. Minimal trim required.
- 15–28 days: Classic dry‑aged flavor and deeper umami notes; crust development increases and trim increases moderately.
- 30–45 days: Pronounced aged character. Many home cooks choose ~30 days as a balance between flavor intensity and yield.
- 45+ days: Intensified, acquired flavors that some prefer; expect significant weight loss and thicker trim.
- When to stop and remove: Base the decision on smell (pleasant nutty/cheesy/umami vs sour or rotten), even crust color (darkening is expected), and your target intensity. If you detect persistent sour, putrid or chemical odors, or see fuzzy green/black mold, discard the cut.
Trimming and portioning (practical tips)
- What to remove: Trim the desiccated crust and any hard fat that oxidized. Small white/gray surface molds are common and are removed with the crust. Discard any areas that are slimy, sticky, green, black or produce a rotten smell.
- Technique: Use a sharp boning knife and make deliberate shallow passes; trim gradually to preserve edible meat. A professional butcher’s style sliding cut helps minimize waste.
- Portioning: For steaks, cut 2–2.5‑inch thickness for reverse sear or sous‑vide finishing. Consider saving trimmed fat and trimmings (if not off‑smelling) for ground applications or rendered tallow.
Cooking recommendations to preserve dry‑aged character
Dry‑aged beef benefits from simpler seasoning and cooking that highlights flavor.
- Reverse sear: Roast steaks at 225–275°F until 10–15°F below final desired temp, then sear on very high heat for a short time to develop a crust. This preserves interior tenderness and highlights the concentrated flavor.
- Sous‑vide + sear: Cook to exact final temp by sous‑vide (e.g., 125°F for medium‑rare), chill briefly, pat dry thoroughly and sear over very high heat. This approach maximizes doneness control and texture retention.
Season lightly with salt and optional pepper; heavy sauces or marinades will mask nuanced aged notes.
Yield and cost example (updated framing)
Example scenario: a 7 lb bone‑in ribeye aged 30 days typically loses ~18–25% weight to evaporation and trim depending on fat cover and aging conditions. That results in ~5.3–5.7 lb usable meat after trimming. Per‑edible‑pound cost increases because of shrinkage and electricity/operating costs, but you gain concentrated flavor and a steakhouse experience at home. Track yield across batches to refine expectations for your specific cuts and setup.
Safety checklist and troubleshooting (concise and current)
- Never age ground beef or small boneless steaks; intact muscle cuts are the only safe option for home dry‑aging.
- Acceptable surface growth: White or grayish molds are common and are trimmed away; blue veins can appear but are generally trim‑able. Any fuzzy green/black mold, sliminess, or persistent rotten odor means discard.
- Temperature excursions: Short, brief excursions above 38°F can occur; prolonged temps above 40°F increase risk. Use your logs and sense — if in doubt, discard.
- Sanitation: Clean and disinfect tools and surfaces between batches. Dedicate the fridge or thoroughly sanitize between uses.
- Cross‑contamination: Don’t store other foods in the aging unit; keep trays to catch drips and empty/clean them regularly.
Common problems and fixes
- Surface over‑hardening: Raise RH slightly or use a permeable aging bag; reduce fan speed.
- Excessive weight loss: Reduce aging time, use permeable bags, or reduce airflow.
- Unpleasant odors: Sour or putrid smells indicate spoilage — discard. Mild nutty, cheesy or ammonia‑lean notes are often normal at advanced ages; if unsure, err on caution.
Pro tips — getting consistent, repeatable results
- Start with one piece and keep a batch log: cut, weight, start/stop dates, average temp/RH, final trimmed weight and sensory notes.
- Use two sensors (meat level and door/ceiling) to detect gradients and avoid surprises when the door is opened.
- When trying different aging times, age duplicate cuts side‑by‑side (for example 14 vs 30 days) to objectively compare flavor and yield.
- Permeable bags are a good option if you want aged flavor with less visible surface mold and reduced weight loss — they are especially useful in small kitchens or multi‑use spaces.
Common mistakes to avoid
- Using the household fridge that stores produce and dairy — cross‑contamination risk and thermal instability.
- Over‑ventilating with a strong fan that dries the edges too rapidly.
- Not logging conditions — without records you can’t reproduce successes or correct failures.
FAQ
Can I dry‑age boneless steaks or small cuts?
No. Boneless steaks and small pieces desiccate too quickly and are high‑risk for uneven drying and surface contamination. Use whole subprimals (≥5 lb) for safe, even aging.
Are permeable dry‑aging bags safe and do they change flavor?
Yes — manufacturer‑tested oxygen‑permeable bags allow enzymatic action while limiting surface dryness and airborne contamination. They tend to produce similar dry‑aged flavor while reducing weight loss; however, bagged and bagless profiles can differ subtly, so experiment to find your preference.
How long can I safely keep a cut at home for aging?
Many home cooks age 14–45 days depending on flavor goals. From a safety standpoint, maintain proper temp (34–36°F), RH (75–82%) and sanitation. Extended ages (45+ days) increase trim and require careful sensory checks for off odors or abnormal growth.
What signs mean I should discard an aged cut?
Discard if you detect persistent rotten or putrid odors, sticky or slimy surfaces, or fuzzy green/black molds. Small areas of white/gray mold are usually trim‑able; when in doubt, err on the side of safety.
Do I need professional testing equipment to be safe?
You don’t need lab equipment, but you do need reliable, calibrated temperature and humidity monitoring — ideally with data logging and alerts. These tools materially reduce risk by letting you spot and correct excursions quickly.
Dry‑aging at home in 2026 is more accessible than ever thanks to purpose‑built units and connected monitoring, but the fundamentals remain: dedicated equipment, narrow and stable temp/RH control, careful inspection, and disciplined hygiene. Use this guide as a checklist, keep a log, and start small — you’ll dial in a flavor profile you love while keeping safety front and center.