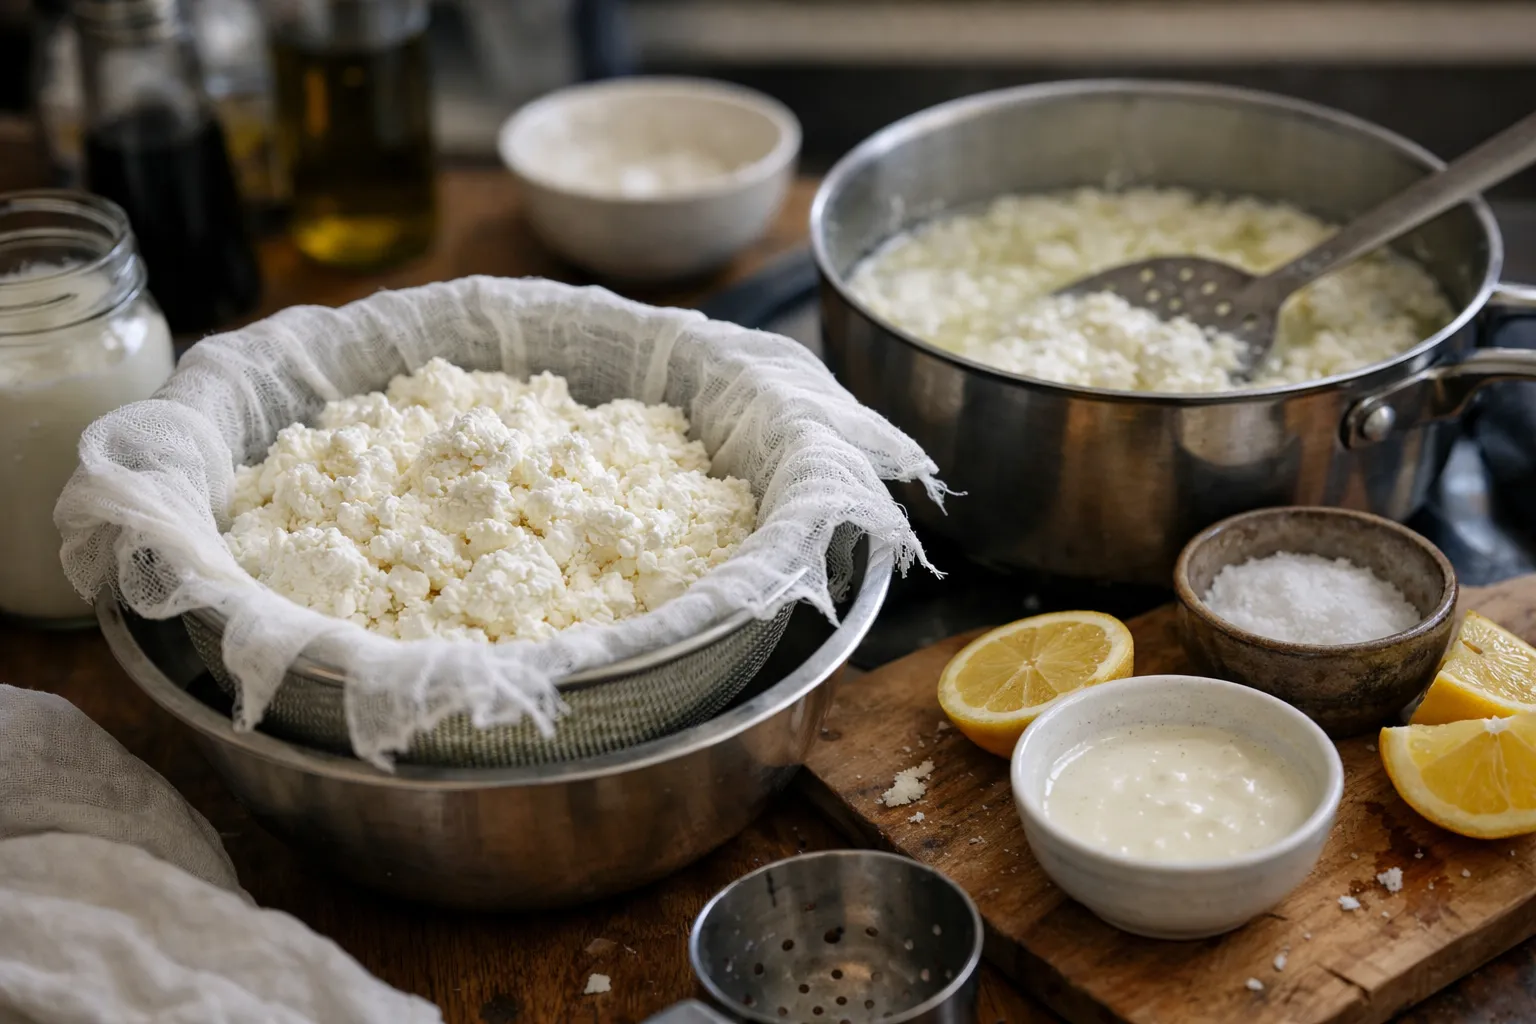
Homemade ricotta remains one of the quickest and most satisfying fresh cheeses you can make in a home kitchen. This refreshed September 2026 guide keeps the simple, reliable stovetop method most cooks prefer, and adds practical updates based on current pantry trends, newer kitchen tools (probe thermometers, sous‑vide), and sustainability‑minded uses for whey. Read this if you make ricotta occasionally or want reliable adjustments for ultra‑pasteurized milk, high altitude, dairy‑free alternatives and batch scaling.
Prerequisites / Context: what to know before you start
Ricotta is a quick acid‑set cheese: heat milk, add an acid, let curds form, drain. The basic steps haven’t changed, but two contextual notes matter in 2026:
- Milk types in 2026: More consumers now buy long‑shelf‑life (ultra‑pasteurized) milks and lactose‑free whole milk. Ultra‑pasteurized milk is widely available but often resists curd formation; plan a workaround (see below) or buy regular pasteurized whole milk for the most predictable results.
- Tools are more precise: Affordable probe thermometers and sous‑vide circulators make temperature control easier — useful if you make ricotta regularly.
Overview: yield, prep time and basic method
- Yield / serving size: 1 quart (≈950–1,000 ml) whole milk → ~1 to 1½ cups (240–360 g) ricotta. Scale linearly.
- Active prep time: 15–25 minutes.
- Total time (including draining): 25–45 minutes depending on desired moisture.
- Method: stovetop curdling with heat + acid; optional sous‑vide for greater temperature control.
What you'll need (updated equipment list)
- Heavy‑bottomed saucepan (2–3 qt for a quart of milk)
- Instant‑read or probe thermometer (probe with clip helpful)
- Slotted spoon or spider strainer
- Fine‑mesh strainer or colander and 1–2 layers of cheesecloth or a clean kitchen towel
- Large bowl for whey
- Measuring spoons and cups
- Optional: sous‑vide circulator and heat‑safe jars if you prefer a hands‑off method
Classic stovetop ricotta (single‑quart batch)
This is the reliable base method updated with small clarifications for 2026 pantry realities.
- Ingredients:
- 1 quart (950 ml–1 L) whole milk (avoid ultra‑pasteurized if possible)
- Optional: 1/4–1/2 cup heavy cream for richer ricotta
- 2 tablespoons fresh lemon juice or white vinegar (start with 2 tbsp)
- 1/4 teaspoon fine sea salt (adjust after tasting)
Step-by-step method
- Line the strainer: Place a colander over a large bowl and line with a double layer of cheesecloth or a fine kitchen towel.
- Heat the milk: Pour milk (and cream, if using) into the saucepan and warm over medium heat, stirring occasionally. Heat to 190–200°F (88–93°C). You should see small bubbles at the edge and gentle steam; do not let the milk hard‑boil.
- Add the acid: Remove the pot from heat. Stir in 2 tablespoons lemon juice or vinegar once, then stop stirring. Let sit undisturbed for 8–12 minutes to allow clear whey to separate from white curds.
- Check curds: If curds haven’t separated, gently return to very low heat and bring to ~185–190°F (85–88°C). Add up to 1/2 tablespoon more acid if needed. Visual separation (clear, slightly yellow whey) is the primary indicator — use the thermometer as a guide.
- Drain: Use a slotted spoon to lift curds into the lined colander, or pour the pot through the strainer. Let drain 15 minutes for soft, spreadable ricotta; 30+ minutes for firmer cheese. For very dry ricotta (for fillings), refrigerate in the strainer overnight.
- Finish and season: Transfer ricotta to a bowl, season with salt to taste, stir gently. Store in an airtight container in the refrigerator.
Workarounds and 2026 pantry realities
Using ultra‑pasteurized milk
Ultra‑pasteurized (UP) milk continues to be widely sold because of convenience, but the extra heat treatment denatures proteins and can make acid‑set curd formation unreliable. Two practical options:
- Buy regular pasteurized milk for easiest results.
- If you only have UP milk: add a tablespoon of live‑culture yogurt or 1–2 tablespoons cultured buttermilk to the warmed milk before adding acid. The cultures help create a curd network; then add acid as directed. Expect slightly softer curds and allow extra time for separation.
Lactose‑free milk
Lactose‑free whole milk behaves like regular milk during heating and curdling; it makes good ricotta. Label indicates “lactose‑free” — follow the same method.
High altitude adjustments
At higher elevations, water boils at a lower temperature, but curd formation depends more on relative heat and the acid reaction than precise boiling. If you live above ~3,000 ft (900 m), rely more on visual cues (clear whey, curd separation) and reduce agitation. Use a thermometer as a reference but prioritize how the milk looks.
Advanced option: sous‑vide ricotta for consistent results
For repeatable temperature control, especially when you make ricotta often, sous‑vide is useful. Method summary:
- Combine milk (and cream) in heat‑safe jars or a vacuum bag. Heat water bath to 190°F (88°C).
- Heat for 20 minutes, remove, add acid to each jar, cap loosely, and let sit 10 minutes.
- Proceed to drain as above.
Sous‑vide reduces the risk of hot spots and scorching and can help when using larger batches. Use proper heat‑safe containers and food‑safe vacuum techniques.
Scaling, yield and serving ideas (2026 flavors & trends)
Scale linearly: 2 quarts milk → ~2–3 cups ricotta; a gallon → ~4–6 cups. In 2026 ricotta continues to appear in both traditional dishes (lasagne, stuffed pastas) and newer trends: ricotta on fortified sourdough toast with seasonal fruit, ricotta mixed with miso for umami‑forward spreads, and ricotta gnocchi as a quick dinner. Suggested serving sizes:
- Ricotta toast: 2 tablespoons per person
- Filling for stuffed pasta: 1/3–1/2 cup per person
- Ricotta with honey/fruit: 1/4 cup per person
Troubleshooting — common issues (and why they happen)
- No curds: Most often because the milk is ultra‑pasteurized or the acid was insufficient. Try adding a little cultured yogurt and more acid while gently warming to 185–190°F.
- Grainy or tight curds: Overheating or too much acid tightens proteins. Heat slower and use the lower end of the temperature range next time; add cream to soften texture.
- Ricotta too wet: Drain longer, or refrigerate in the strainer for a few hours or overnight. For baking, squeeze excess whey from the curds gently.
- Too salty or bland: Adjust salt at the end; small amounts make a big difference. For low‑sodium diets, omit added salt and rely on herbs, citrus zest or umami ingredients.
Whey: sustainability and practical uses
Don’t discard the whey. Home cooks in 2026 increasingly save whey for economical and sustainable uses. Practical ideas:
- Baking: Replace some liquid in bread, pizza dough or batter with whey for flavor and better fermentation.
- Sourdough starter feed: Use cooled whey to feed starters—its acidity can encourage fermentation (monitor starter health carefully).
- Smoothies and soups: Use whey as a liquid base for blended soups and smoothies—adds protein and a mild tang.
- Fermenting and pickling: Use whey in place of vinegar for certain lacto‑ferments to encourage lactic bacteria.
Dietary adaptations (updated)
Dairy‑free ricotta alternatives
Commercial and home plant‑based ricotta options have improved. Reliable home substitutions:
- Silken tofu ricotta: Blend 12 oz silken tofu, 2 tbsp lemon juice, 1 tbsp olive oil, 1–2 tbsp nutritional yeast (optional), 1/4 tsp salt. Adjust with water for texture.
- Cashew ricotta: Soak 1 cup raw cashews 20–30 minutes in hot water, drain, blend with 2–3 tbsp lemon juice, 2–4 tbsp water, 1/4 tsp salt.
Newer plant milks (cultured oat cream products) can be used to make ricotta‑style curds in some recipes; results vary by brand.
Storage and shelf life (safety‑first)
Store homemade ricotta in an airtight container at ≤40°F (≤4°C). Best quality is 3 days; you can keep it up to 4 days if the milk was very fresh and handled carefully. For longer storage, freeze ricotta for up to 3 months — expect some texture change: thawed ricotta is best used in cooked dishes.
Advanced tips for perfect texture
- For silkier ricotta, add 1/2 cup heavy cream per quart of milk.
- Heat slowly and minimize stirring after the acid is added; aggressive agitation breaks curds into small pieces.
- Experiment with acids: lemon juice gives brightness; distilled white vinegar is neutral; apple cider vinegar adds subtle fruitiness.
- For very dry ricotta (useful for fillings), drain in the fridge overnight in the lined strainer.
Common mistakes to avoid
- Using the wrong milk without adjusting technique — if you only have ultra‑pasteurized milk, use the yogurt starter workaround or use lactose‑free whole milk instead.
- Boiling the milk aggressively — scorching destroys flavor and can create bitter notes.
- Draining too briefly for baked applications — extra moisture can make fillings runny.
Pro tips (seasoned home cooks)
- Make ricotta the day before an event — the flavor tightens and it’s easier to work with for fillings.
- Reserve whey and reduce it for a savory glaze: simmer whey with a touch of honey and reduced until syrupy for finishing roasted vegetables.
- Use a fine perforated ladle to gently lift curds to preserve their shape if you want a rustic texture.
- If you make ricotta often, invest in a probe thermometer with an alarm or a low‑cost sous‑vide to standardize batches.
FAQ
Can I make ricotta from ultra‑pasteurized milk?
Yes, but results are less predictable. Add 1 tablespoon live yogurt or 1–2 tablespoons cultured buttermilk to warmed UP milk before adding acid, and allow extra time for separation. For the most consistent curds, use regular pasteurized whole milk when possible.
How long will homemade ricotta last in the fridge?
Store at ≤40°F (≤4°C) in an airtight container. Use within 3 days for best texture and safety; up to 4 days can be acceptable with very fresh ingredients and careful handling. Freeze up to 3 months for cooked uses.
Does adding cream change how the curds form?
Adding up to 1/2 cup heavy cream per quart makes the ricotta richer and softer; it slightly increases yield and produces creamier curds, but the overall curd formation process remains the same.
What should I do with the leftover whey?
Save it. Use it in bread dough, as a smoothie liquid, to feed sourdough starters (sparingly), for lacto‑ferments, or to simmer and reduce into a savory glaze. It’s a versatile, low‑waste ingredient.
Is sous‑vide really better for ricotta?
Sous‑vide isn’t required but helps when you want precise, repeatable temperature control or when making larger batches. It reduces hot spots and risk of scorching; otherwise the stovetop method is fast and reliable.
Final notes
Making ricotta at home remains fast, economical and flexible in 2026. The core stovetop method endures, but updated pantry realities — more ultra‑pasteurized milk, better consumer tools and a stronger emphasis on reducing kitchen waste — mean small adjustments improve success and usefulness. Try a batch this week: spread warm on toast with honey and flaky salt, fold into lemon pasta, and keep the whey — you’ll use it.