
By David Park — Real Estate & Tax Correspondent. You’ll finish with set whites, glossy spoonable yolks, and fewer wasted eggs. This August 2026 update adds recent practical hacks (electric‑kettle starts, pressure‑cooker timings), fresh peelability guidance, pasteurized‑egg options for vulnerable eaters, and household‑economy context so you see how mastering one technique saves time and money over years.
What You'll Learn
- How to make consistent jammy 7‑minute eggs on a stove with updated tech and timing
- When to use sous‑vide, a pressure cooker (Instant Pot style), or an electric‑kettle method for repeatable results
- Peeling strategies, altitude and egg‑size adjustments, and food‑safety choices (USDA FSIS guidance)
- How this small kitchen skill improves household efficiency and reduces food waste over time
What You'll Need
Ingredients
- Large eggs (adjust times—see timing table)
- Ice and cold water for an ice bath
- Optional: 1–2 tbsp white vinegar or 1 tsp baking soda
- Optional: Pasteurized shell eggs or liquid pasteurized eggs when serving vulnerable people
Tools
- Medium saucepan with lid or wide shallow pot
- Slotted spoon or spider
- Kitchen timer (phone is fine)
- Bowl for ice bath
- Optional: Sous‑vide immersion circulator, pressure cooker/Instant Pot, or electric kettle
Prep time: 5 minutes
Cooking time: 6–8 minutes (stovetop), 45–60 minutes (sous‑vide), ~5 minutes (pressure cooker method)
Serving size: 1–2 eggs per person
Food‑safety note: The USDA Food Safety and Inspection Service (FSIS) advises cooking eggs until yolk and white are firm for young children, pregnant people, older adults, and immunocompromised individuals. If you need soft yolks for those groups, use commercially pasteurized eggs or fully cook the yolk.
Step‑by‑Step Instructions
Core stovetop method (updated for consistency)
- Set up your ice bath first: fill a medium bowl with ice, top with cold water so ice floats — you’ll use this immediately.
- Fill a pot with enough water to cover eggs by 1 inch. Bring to a full rolling boil over high heat.
- Reduce to a gentle, steady boil (active bubbles but not violent). Use the slotted spoon to lower cold eggs in one at a time.
- Start your timer for 7 minutes when the last egg enters. Expect water to return to a gentle boil in 30–60 seconds; if it doesn’t, raise heat slightly.
- When time is up, transfer eggs immediately to the ice bath. Chill 5 minutes minimum; 10 minutes is ideal for peeling ease.
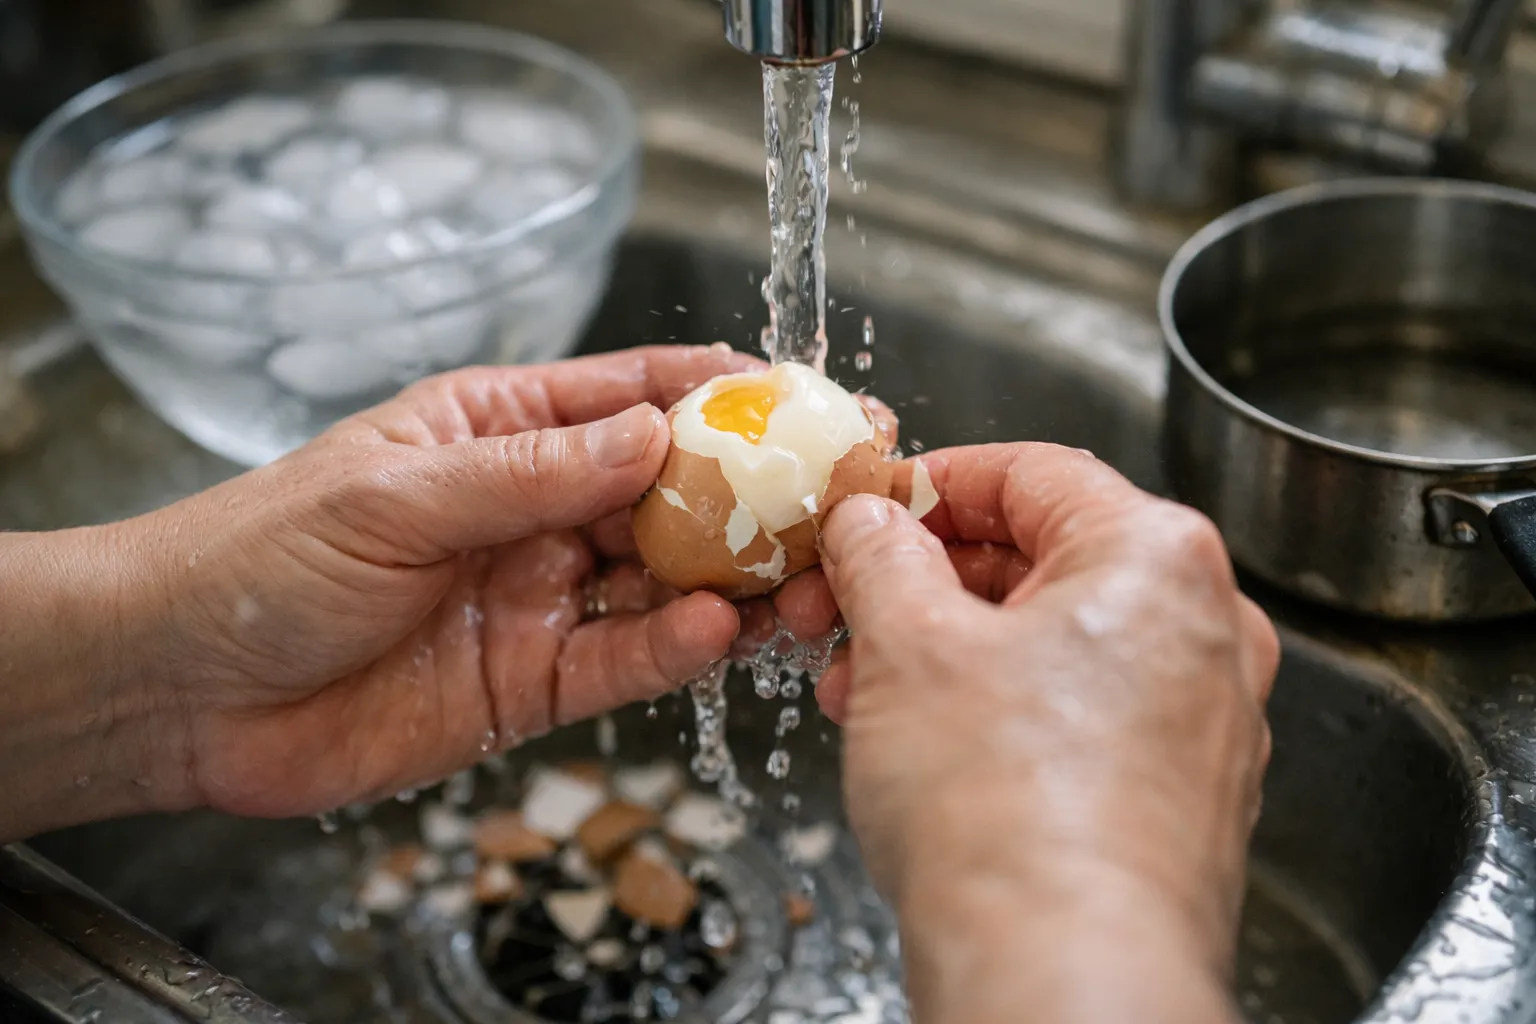
- Peel by tapping the wide end, rolling to create cracks, then peeling under a thin stream of water or submerged.
Expected result: Whites set; yolks thick, glossy and spoonable.
Electric‑kettle pour‑over method (consistent without a stove)
- Boil water in an electric kettle. Place eggs in a heatproof container and pour boiling water to cover by 1 inch.
- Cover the container and set a timer for 7 minutes. Transfer to an ice bath immediately when time is up.
Why: This removes stove‑to‑stove variability and is energy efficient—useful for renters or small kitchens.
Pressure cooker / Instant Pot option
- Place 1 cup water and an elevated rack in the cooker. Add eggs on the rack.
- Cook on high pressure for 4–6 minutes depending on desired jamminess (4–5 for runnier, 5–6 for classic jammy).
- Quick release, then plunge into ice bath 5+ minutes.
Expected result: Fast, repeatable; best to test 1 egg to calibrate your model.
Sous‑vide (precision option)
- 63°C (145.4°F) for 45–60 minutes — silky whites, custardy yolk. For slightly firmer yolks try 64°C for 40 minutes.
- Sous‑vide removes stove and altitude variability and is ideal if you prepare eggs in bulk for meal kits or hosting.
Timing & Adjustment Guide
- More runny: 6–6½ minutes (stovetop)
- Standard jammy: 7 minutes
- More set, still jammy: 7½–8 minutes
- Hard‑boiled: 10–12 minutes
Egg size: Extra‑large: add ~15–30 seconds. Medium: subtract ~15–30 seconds.
Altitude: Above ~3,000 ft (900 m) add ~30–60 seconds as a starting point; test and adjust.
Screenshots / Visual Cues (What You Should See)
- Boil level: Active bubbles but eggs aren’t slamming into each other
- Ice bath: Ice still present after transfer; water looks cold and beads on shells
- Peeled egg: Smooth white with minimal pitting
- Cut egg: Whites opaque; yolk thick, glossy, spoonable
Troubleshooting
My eggs turned hard‑boiled
Cause: Overcooking or insufficient chill. Fix: Reduce time by 30–60 seconds and ensure a full 5–10 minute ice bath to stop carryover cooking.
The yolk is too runny
Cause: Undertime, large eggs, or water temperature dropped. Fix: Add 30–60 seconds next time; verify the water returns to a gentle boil quickly.
Shells stick and tear the white
Cause: Very fresh eggs or not chilled enough. Fix: Chill longer, peel under water, add 1 tsp baking soda to boiling water for one batch, or use eggs aged 7–10 days after purchase.
An egg cracked in the pot
Cause: Aggressive boil or egg hit pot. Fix: Calm the boil, lower eggs gently with a spoon, or add 1–2 tbsp vinegar to coagulate escaped whites.
Next Steps — Use, Store, and Scale
- Serve: Halve and top ramen, grain bowls, salads or breakfast to extend meals across a week.
- Storage: Refrigerate within 2 hours. For soft‑yolk eggs, aim to eat within 2–3 days; for fully hard‑cooked eggs, USDA FSIS allows up to 1 week.
- Batch prep: Cook 6–12 eggs on a prep day to reduce waste and lower per‑meal cost — small efficiencies like this compound into real household savings over years.
- For vulnerable eaters: Use commercially pasteurized shell eggs or liquid pasteurized eggs if you want a soft yolk without increased risk.
Why This Still Matters
Making perfect jammy eggs is more than a food trick: it’s a repeatable piece of household productivity. In 2026, more home cooks use precision tools, but even without them you can create a consistent result that saves time, reduces food waste, and supports family meal planning. Treat this as a small operational upgrade that compounds—one reliable batch each week yields dozens of ready proteins across months, lowering grocery cost per meal and improving nutritional convenience.
Frequently asked questions
Can I safely give jammy eggs to a pregnant person or toddler?
No. The USDA FSIS advises cooking eggs until both yolk and white are firm for pregnant people, very young children, older adults, and immunocompromised individuals. If you want a softer yolk but need to avoid risk, use commercially pasteurized eggs.
Will baking soda or vinegar change the flavor?
In the small amounts suggested (1 tsp baking soda or 1–2 tbsp vinegar per pot) you should not notice a flavor change. Baking soda raises pH to aid peeling; vinegar helps whites coagulate if a crack occurs.
Is sous‑vide worth it for home cooks?
If you value repeatability and weekly batch prep, yes. Sous‑vide removes stove and altitude variables and is especially useful if you prepare eggs for meal kits, entertaining, or small food businesses.
How can I scale this for meal prep economically?
Batch‑cook once per week (6–12 eggs). Use jammy eggs across breakfasts, salads and bowls to reduce reliance on expensive convenience proteins; the time saved and reduced waste add measurable household value over months and years.