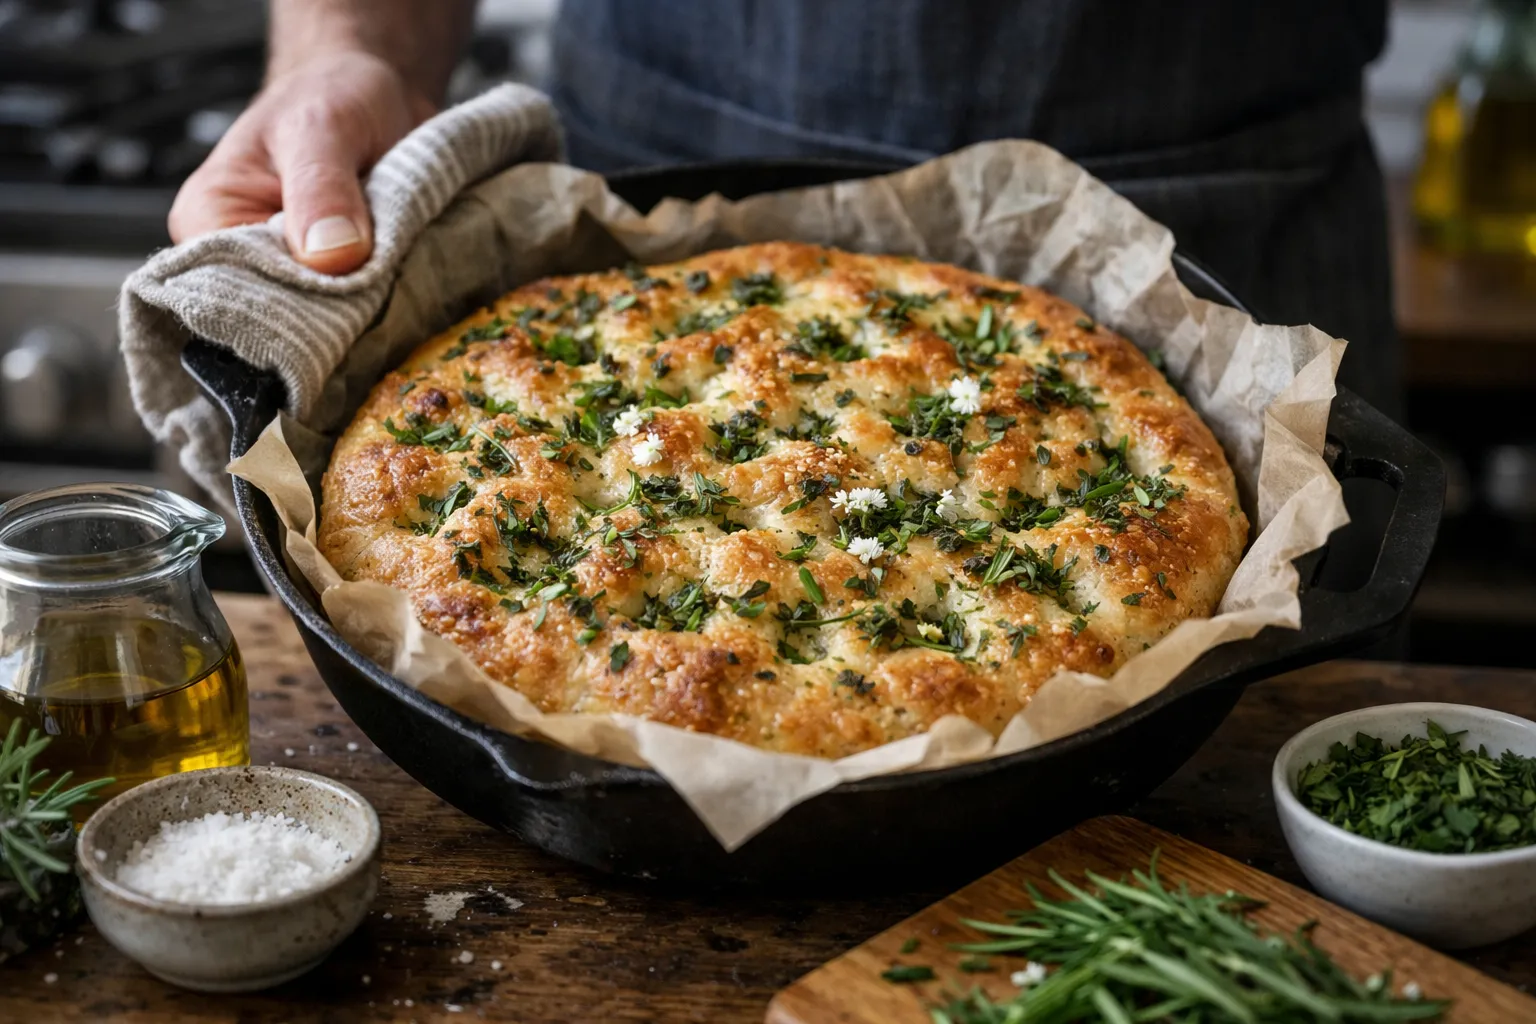
What you'll learn: How to make an overnight no‑knead spring herb focaccia that produces an open, pillowy crumb and crisp edges—updated for September 2026 with current proofing, temperature and ingredient guidance so you get consistent results in varied kitchens and climates.
What you'll need
- Tools: Digital scale (grams), 9×13‑inch (rimmed) metal baking sheet or shallow rimmed pan, oven thermometer, bench scraper, oiled fingertips, instant‑read thermometer or probe.
- Optional tech: Convection oven setting or baking steel, proofing app or kitchen thermometer with logging (handy in hot climates).
- Time: Active hands‑on ~20 minutes; cold overnight ferment 12–48 hours (see options); final proof 45–60 minutes; bake 18–22 minutes.
- Skill level: Beginner to intermediate—no kneading required, but you must manage hydration and proofing times.
Ingredients (9×13‑inch pan — serves 6–8)
- 500 g (3 1/3 cups) bread flour or high‑protein all‑purpose flour
- 400 g (1 2/3 cups) water, room temperature (80% hydration). Adjust below for whole‑grain.
- 10 g (2 tsp) fine sea salt
- Yeast options (pick one): Fast — 5 g (1 tsp) instant yeast for 2–3 hour room proof; Standard — 3 g (1/2 tsp) instant yeast for 12–18 h cold retard; Slow/Flavor — 1–2 g instant yeast for 24–48 h cold ferment.
- 45 g (3 tbsp) extra‑virgin olive oil, plus 2 tbsp for the pan
- Fresh herbs: 2 tbsp chopped rosemary + 2 tbsp chopped chives or thyme (plus extra for garnish)
- Flaky sea salt for finishing
Why the yeast options? In 2026 home bakers commonly use lower yeast for longer cold ferments to deepen flavor; very long retards need 1–2 g to avoid overproofing and off‑flavors in warm kitchens.
Step-by-step instructions
1. Mix (10 minutes)
- Weigh flour, salt and yeast into a large bowl. If using active dry yeast, dissolve it in 25–50 g of the recipe water warmed to 35–40°C and wait 5–10 minutes until foamy.
- Add the remaining water and 30 g olive oil. Stir with a spatula until a shaggy, very sticky dough forms and no dry pockets remain. Expect a wet, loose dough at 80% hydration.
- Cover tightly and rest 30 minutes at room temperature (autolyse). Expected result: dough will be smoother and slightly more cohesive.
2. Cold bulk ferment (overnight or longer)
- After autolyse, give the dough one or two gentle folds in the bowl with wet hands. Cover tightly and refrigerate.
- Timing guidance: 12–18 h for typical overnight (use 3 g yeast); 24–48 h for deeper flavor with 1–2 g yeast. Keep fridge at ≤4°C for food safety and predictable fermentation.
- Expected result: dough should rise modestly and show bubbles across the surface. If it doubles within 12 h, reduce yeast next time.
3. Shape in the pan and final proof (15 minutes prep + 45–60 minutes)
- Oil the pan with 2 tbsp olive oil. Scrape chilled dough into the pan—it will resist but relax in minutes.
- Oil your fingers and gently coax dough toward the edges; if it snaps back, rest 10 minutes and continue. Aim for an even thickness ~1 inch.
- Scatter chopped rosemary and chives over the surface, pressing lightly. Cover and proof at room temperature until puffy (not necessarily doubled), 45–60 minutes. In hot climates or during heat waves in 2026, proof in a cooler room or near an air‑condition vent to avoid overproofing.
4. Dimple, oil and season
- Preheat oven: conventional 475°F (246°C) or 450°F (232°C) if you use convection—use an oven thermometer to confirm. If you have a baking steel/stone, preheat it on the middle rack.
- Use oiled fingertips to press deep dimples across the dough. Drizzle remaining olive oil across the surface so it pools in some dimples. Finish with flaky sea salt and extra herb sprigs.
5. Bake (18–22 minutes)
- Bake 18–22 minutes until top is deep golden and edges are crisp; rotate at 12 minutes if your oven has hot spots. Expected result: well‑browned top with visible dimple pockets filled with oil.
- For extra bottom crisp, finish on a preheated steel for 2–3 minutes or transfer to the lowest rack for the last 2 minutes—watch closely to avoid overbrowning.
- Cool 10 minutes on a rack, then cut. Serve warm or at room temperature.
Screenshots / Visual cues (what you should see)
- After autolyse: dough appears cohesive but still wet, with a slightly glossy surface.
- After cold ferment: bubbles visible under the surface and dough has a relaxed, slightly increased volume.
- During final proof: dough should become noticeably puffy and retain an indentation when you press lightly.
- After baking: deep golden top, crisp edges, oil pooled in some dimples and an airy crumb when you tear a piece.
Troubleshooting — common issues and fixes
- Dough too sticky to handle: For your first run, reduce water by 25–50 g (start with 25 g). Wet hands and spatula help manage high hydration.
- Dense crumb: Underproofed or cold interior. Ensure final proof is puffy; if using whole‑grain flour, increase water by 20–30 g and add an extra 10–15 minutes of proof.
- Overproofed (collapse): Reduce yeast, shorten cold time, or proof in a cooler spot. In warm kitchens, use 1–2 g yeast for long retards.
- Uneven browning: Use an oven thermometer, rotate halfway, and consider preheating a baking steel for even bottom heat.
- Safety concern: If your fridge runs above 5°C, shorten cold ferment to under 18 hours to avoid unpredictable fermentation.
Dietary modifications (updated)
- Vegan: recipe is naturally vegan.
- Whole‑grain: Replace up to 150 g flour with whole‑wheat; add 20–30 g water and expect shorter baking time (check crumb at 18 minutes).
- Gluten‑free: Use a commercial gluten‑free bread blend formulated for high hydration and include 6–8 g psyllium husk or 3–5 g xanthan gum. Bake in a smaller pan and skip long cold retards—proof at room temperature 60–90 minutes.
- Low‑sodium: Reduce dough salt to 6 g and use minimal flaky salt on top.
Make‑ahead, storage and freezing
- Make‑ahead: Dough can be refrigerated up to 48 hours for most kitchens; in very warm climates keep to 24 hours or use the 1–2 g yeast option.
- Storage: Room temperature airtight 48 hours; refrigerate up to 5 days. Reheat at 350°F for 8–10 minutes to refresh crust.
- Freezing: Slice and freeze single layers up to 2 months; rewarm frozen slices at 350°F for 12–15 minutes.
Why this still works in 2026
The overnight cold‑retard method remains popular because slow fermentation produces complex flavors and friendly handling for home bakers. In 2026 the small‑ yeast/long‑retard approach is widely used to balance flavor development, energy use (you can ferment overnight in a low‑power fridge) and kitchen predictability across varied climates.
Next steps
- Once you master the base, experiment with seasonal toppings: preserved lemon and thyme, roasted garlic and miso, or za'atar and sesame.
- Try a baking steel for a crisper bottom, or scale the recipe for a quarter‑sheet pan for thicker focaccia.
- Track proofing times and fridge temps for three bakes to dial in the yeast amount that suits your kitchen.
FAQ
Can I shorten the cold fermentation if I’m short on time?
Yes. Use 5 g instant yeast and proof at room temperature 2–3 hours total. Expect less depth of flavor and slightly tighter crumb, but the method still produces good texture.
How do I adjust for high‑altitude or very hot kitchens?
At high altitude, reduce yeast slightly and increase oven temp by 10–15°F if browning is slow. In hot kitchens, lower yeast (1–2 g) for long retards and keep the fridge at ≤4°C; proof in a cooler room to avoid overproofing.
Is long cold fermentation safe food‑safety‑wise?
Yes, when refrigerated correctly. Keep your fridge at or below 4–5°C and salt levels as listed. For retards beyond 48 hours monitor for off smells or discoloration and discard if anything seems wrong.
Why weigh the ingredients instead of using cups?
Weight gives consistent hydration and results across different flours and environments. High‑hydration doughs are especially sensitive to small variances—use a scale.