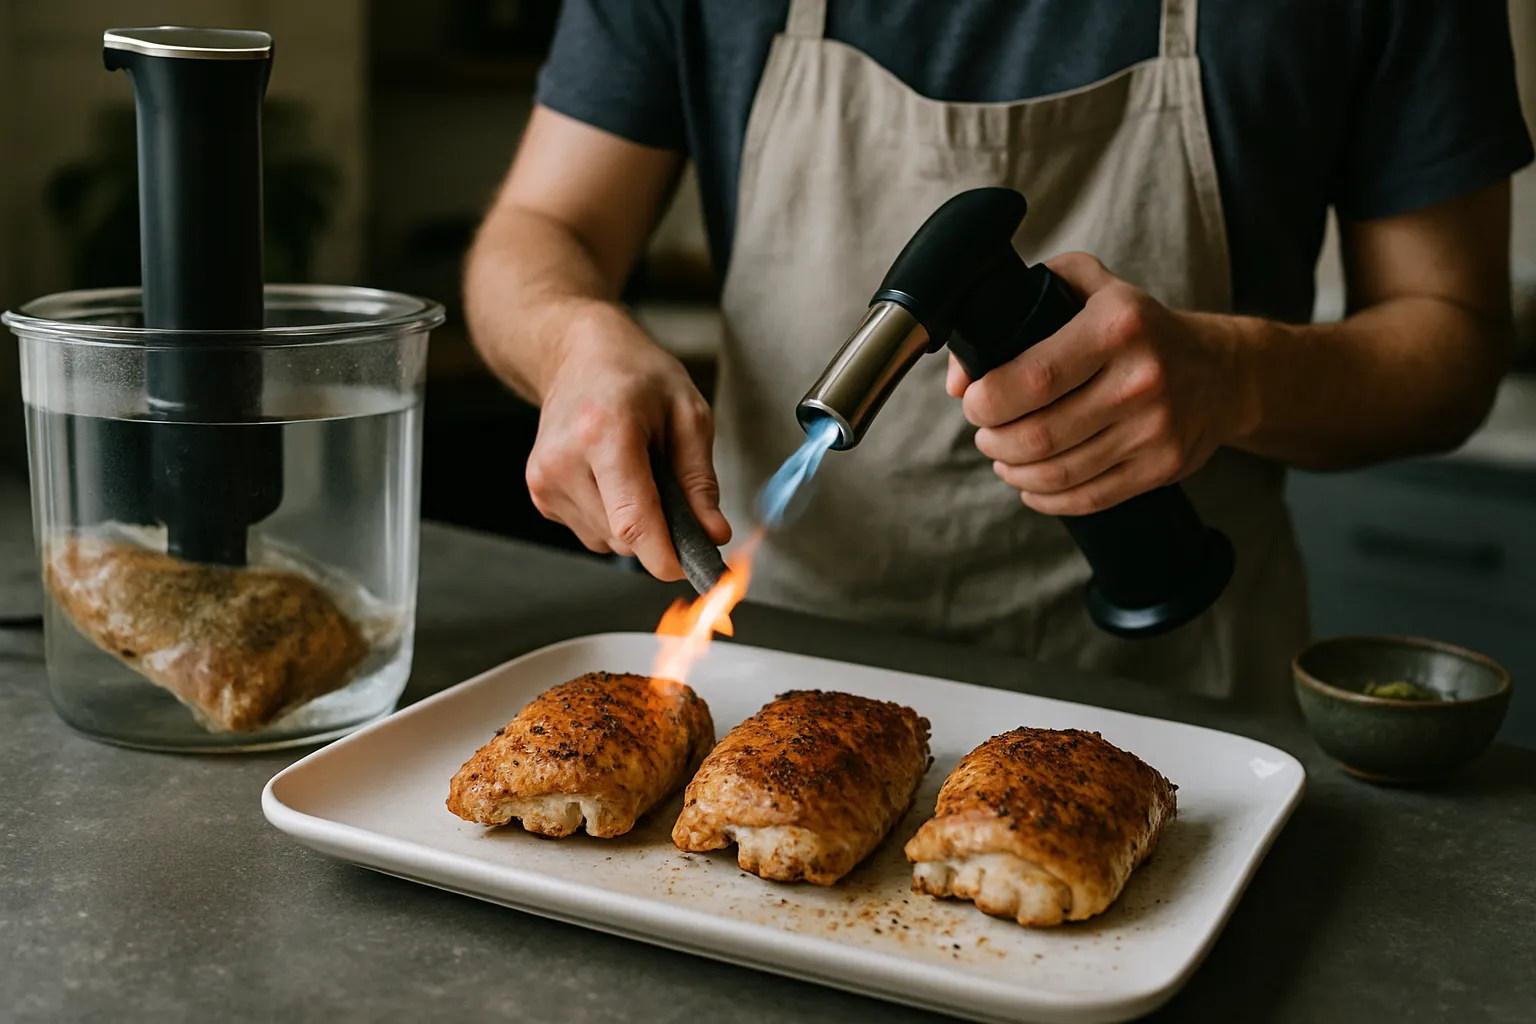
If you want reliably juicy, intensely flavored chicken every time, sous‑vide thighs remain one of the easiest and most forgiving ways to get there. This September 2026 update keeps the practical step‑by‑step method you already trust, but adds the latest safety guidance, finishing options (air‑fryer and infrared searing), bone‑in timing, and small workflow tweaks that reflect what home cooks reported using in 2024–2026: smart circulators, quick chill for meal prep, and air‑fryer crisping. This guide is for home cooks who want predictability and restaurant‑level results with minimal fuss.
What you should know first (prerequisites & context)
Before you start: sous‑vide is precision cooking that uses time + temperature to both texture and pasteurize food. The USDA still recommends 165°F (74°C) as a safe immediate endpoint for poultry; however, lower temperatures can be used safely if the meat is held long enough to achieve equivalent pathogen reduction. For exact time‑and‑temperature pasteurization targets, consult the USDA/FSIS pasteurization tables and your local food‑safety authority. If you're cooking for people who are immunocompromised, elderly, pregnant, or very young, use 165°F or follow conservative pasteurization guidance.
Equipment has become more affordable and feature‑rich: many consumer immersion circulators now include app control, multi‑device recipe syncing, and better insulation options. You do not need top‑end pro gear to get excellent results; a reliable immersion circulator, a sealed bag, and a hot sear will do most of the work.
Updated equipment & pantry checklist (what’s changed in 2026)
- Immersion circulator (Wi‑Fi or Bluetooth models add convenience for multi‑hour cooks)
- Large pot or sous‑vide container (6–12 L) with a lid or low‑profile insulating cover to reduce evaporation on long cooks
- Vacuum sealer + bags, or heavy‑duty freezer zip‑top bags (water‑displacement method). Reusable silicone vacuum bags are more common now and reduce waste.
- Cast‑iron skillet or heavy pan for searing; or an infrared countertop searer/air fryer for fast crisping
- Instant‑read thermometer and/or probe for quick checks after finishing
- Paper towels, high‑smoke‑point oil (grapeseed, avocado), and optional kitchen torch or broiler
- Optional: small silicone rack or bag weights to keep bags submerged; lid or plastic wrap to limit evaporation on long cooks
Plan your batch and prep time
Active prep: 10–20 minutes per batch. Finishing time: 5–10 minutes per serving. Cook time depends on the temperature you choose (see next section) and generally ranges 1–4 hours for common textures. For bone‑in thighs add roughly 30–60 minutes to hold time or choose a longer window (2–4 hours) to be safe. For servings, plan 2 thighs per person for an entrée portion, 1–2 for salads or tacos.
Temperature, texture and safety (updated guidance)
Below are practical target temperatures and common hold windows. These deliver predictable textures while balancing convenience and food safety. For lower temperatures, always reference USDA/FSIS pasteurization tables for the exact hold time required to achieve safe pathogen reductions.
- 165°F / 74°C — Classic, fully "done"
Time: 1 hour (1–4 hours acceptable). Texture: shreddable, familiar "fully cooked" mouthfeel. Best simple safety margin for all diners. - 150°F / 66°C — Tender, sliceable
Time: 2–3 hours. Texture: succulent, firm enough to slice; widely used by home cooks and restaurants for balance of tenderness and bite. - 140°F / 60°C — Silky, very tender
Time: 2–4 hours. Texture: very tender and silky; excellent for skinless thighs and for shredding after a brief sear. Requires adherence to pasteurization tables for safety.
Note on very low temps (131–136°F / 55–58°C): These produce exceptional silkiness but require longer holds and strict food‑safety discipline; they are best used only if you understand and can follow the USDA pasteurization guidance exactly.
Basic technique — step‑by‑step (updated tips included)
- Season and bag (10–15 min): Pat thighs dry. Season with kosher salt and pepper; add aromatics (garlic, lemon, thyme) and 1 tbsp neutral oil or butter per bag if desired. Arrange thighs in a single layer without overlapping; for bone‑in leave space so heat can circulate. Vacuum seal or use zip‑top bags with the water‑displacement method.
- Set up the bath: Fill container and preheat to your target temp. Use a lid, plastic cover, or a folded towel across the top to limit evaporation for longer cooks. If your circulator app supports it, set a delayed start or timer linked to your smartphone.
- Submerge and cook: Clip bags to the container edge and submerge fully. For bone‑in thighs, plan on the longer end of the window. Smart circulators can alert you to low water levels or finish time; still monitor for evaporation on multi‑hour cooks.
- Optional rapid cool (if not serving immediately): If you’re batch‑cooking for later, move sealed bags to an ice bath (approx. 4–6 cups ice to 1 liter water) immediately after the cook to drop temperature quickly before refrigerating. Rapid chill helps food safety and preserves texture. Then refrigerate within 2 hours.
- Dry and finish (5–10 min): Remove thighs from bag and pat very dry — surface moisture is the enemy of color. Finish options (choose one):
- Cast‑iron skillet: smoking hot, 30–60 seconds per side to brown; skin‑side down first if cooking with skin.
- Infrared searer or countertop searing device: seconds to achieve deep Maillard crust without overcooking interior.
- Air fryer: 3–6 minutes at 400–425°F to crisp skin—works well for multiple thighs and minimizes splatter.
- Broiler or kitchen torch: 1–3 minutes under a high broiler, or a few pass‑throughs with a torch for targeted charring.
- Rest and serve: Let rest 2–3 minutes, slice or shred as needed, and plate. If you used a glaze (miso, honey), spoon some into the hot pan to caramelize for 20–30 seconds—watch closely to prevent burning.
Three updated flavor builds (4 boneless skin‑on thighs; adjust ratios)
Each build assumes ~1.5–2 lb (700–900 g). Cook times shown use 150°F unless otherwise noted—adjust per desired texture.
Lemon‑Thyme & Garlic — bright and versatile
- Ingredients: zest of 1 lemon + 2 thin slices, 3 smashed garlic cloves, 6 thyme sprigs, 1 tbsp olive oil, 1 tsp kosher salt, ½ tsp black pepper.
- Method: Cook at 150°F (66°C) for 2 hours. Finish skin‑side down in a hot pan; squeeze fresh lemon before serving.
- Serve over farro, with charred asparagus, or shredded into a salad.
Soy‑Miso Honey — umami with a modern twist
- Ingredients: 1 tbsp white miso, 1 tbsp honey, 2 tbsp low‑sodium soy or tamari (GF), 1 tbsp rice vinegar, 1 tsp sesame oil, 1 grated clove garlic.
- Method: Cook at 150°F for 2–3 hours. After the bath, pat dry, sear quickly, then glaze in the pan for a glossy finish. For gluten‑free use tamari; swap honey for maple if avoiding bee‑products.
- Great for grain bowls or steamed rice bowls with scallions and sesame seeds.
Smoky Chipotle & Lime — bold and grill‑style
- Ingredients: 1–2 tsp minced chipotle in adobo, zest & juice of 1 lime, 1 tbsp olive oil, ½ tsp smoked paprika, 1 tsp kosher salt.
- Method: Cook at 165°F for 1–2 hours for easy shredding, or 150°F for 2–3 hours for sliceable thighs. Finish under broiler or in a hot pan for char. Shred for tacos or serve over roasted vegetables.
Searing & crisping — practical tricks that work in 2026 kitchens
- Surface must be dry: pat thoroughly with paper towels or a clean kitchen cloth before searing.
- Use a very hot surface and a high‑smoke oil. Cast iron still gives the deepest crust; infrared searers deliver restaurant‑grade browning in seconds and are increasingly common in home kitchens.
- Air fryers are an efficient option for crisping multiple thighs with minimal splatter—3–6 minutes at 400–425°F typically does the job for skin.
- For low‑temperature cooks that have trouble browning, a quick dusting of a small amount of sugar or miso glaze can help caramelize—use sparingly so it doesn't burn.
Storage, meal prep, and reheating (updated best practices)
Refrigerate cooked sous‑vide thighs in airtight containers for up to 4 days. For longer storage, freeze in vacuum bags or freezer bags for best quality up to 3 months. When reheating, use a 140°F water bath for 20–30 minutes to warm through without overcooking, then re‑sear or air‑fry for crispness. If you cooked several hours ahead, rapidly chill in an ice bath (20–30 minutes) before refrigerating to stay within safe cooling windows.
Common mistakes to avoid
- Bag not fully submerged or touching the circulator intake—can cause uneven cooking or floats. Use clips, weights, or a silicone rack.
- Trying to brown wet meat—pat very dry and use a hot surface.
- Assuming low temperatures are instantly safe—always follow pasteurization time tables when cooking below 165°F.
- Skipping the rapid chill when meal‑prepping—cooling slowly increases bacterial risk and changes texture.
Pro tips (advanced)
- Pre‑sear vs post‑sear: Pre‑searing adds flavor but makes it harder to dry the skin; post‑sear generally gives better final texture and is the common professional approach.
- Batch cooking: Cook thighs at 150°F for 2–3 hours, chill in ice bath, then freeze in portioned vacuum bags for grab‑and‑reheat meals—this workflow minimizes waste and keeps texture consistent.
- Use a probe thermometer right after finishing to confirm exterior temps when serving large groups—instant‑read checks the sear but don’t stick the probe before the seal is broken during sous‑vide.
- For bone‑in thighs, consider a 2–4 hour window and add 30–60 minutes to minimum times to ensure heat penetration into the bone area.
Troubleshooting quick fixes
- No color after sear: surface was too wet—pat dry and try again in a smoking‑hot pan or use an infrared searer.
- Rubbery texture: usually from too‑long exposure to higher temperatures; reduce temp slightly or shorten time next batch.
- Bag floats: remove trapped air, weigh down with a spoon, or use clips to anchor the bag.
Why this still matters in 2026
Sous‑vide chicken thighs deliver consistent results with less active attention than pan‑roasting or grilling. With better, cheaper hardware and app integration now common, home cooks can replicate restaurant textures while saving time. Following current food‑safety guidance—using USDA/FSIS pasteurization recommendations and rapid chill for meal prep—keeps sous‑vide both convenient and safe.
FAQ
Do I need a vacuum sealer, or are zip‑top bags sufficient?
Zip‑top bags used with the water‑displacement method are perfectly acceptable for most home cooks, especially for short cooks under 4 hours. Vacuum sealing gives the tightest contact and is cleaner for long cooks or for freezing, but reusable silicone bags are an increasing sustainable alternative.
Can I sous‑vide bone‑in thighs and how do times change?
Yes. Bone‑in thighs are great sous‑vide. Plan on adding roughly 30–60 minutes to the minimum hold times listed for boneless thighs, or choose a longer window (2–4 hours) to ensure even heat around the bone. Use a probe after finishing if you need to confirm doneness for large batches.
Is it safe to sous‑vide at 140°F? What about very low temps?
Cooking at 140°F produces a very tender texture but requires a sufficient hold time to achieve pasteurization. It’s safe if you follow USDA/FSIS time‑and‑temperature tables exactly. If you prefer a simpler safety margin, cook at 165°F for at least 1 hour. For vulnerable diners, stick with higher temps.
What’s the best way to reheat leftover sous‑vide thighs?
Reheat gently in a 140°F water bath for 20–30 minutes to warm without overcooking, then re‑sear or air‑fry for 2–4 minutes to restore crispness. If frozen, thaw overnight in the refrigerator first.
How do I keep bags from floating during long cooks?
Use bag clips to anchor bags to the container rim, a small heavy spoon, or silicone bag weights. Some cooks layer a wire rack or use a perforated pan to keep bags submerged and away from the circulator intake.
Try two temperatures this week—150°F for sliceable thighs and 140°F or 165°F for a contrast—and run the three flavor builds across them. With the small finishing updates here (air fryer, infrared searing, rapid chill), you’ll find the workflow that fits your kitchen and schedule while keeping results predictable and delicious.