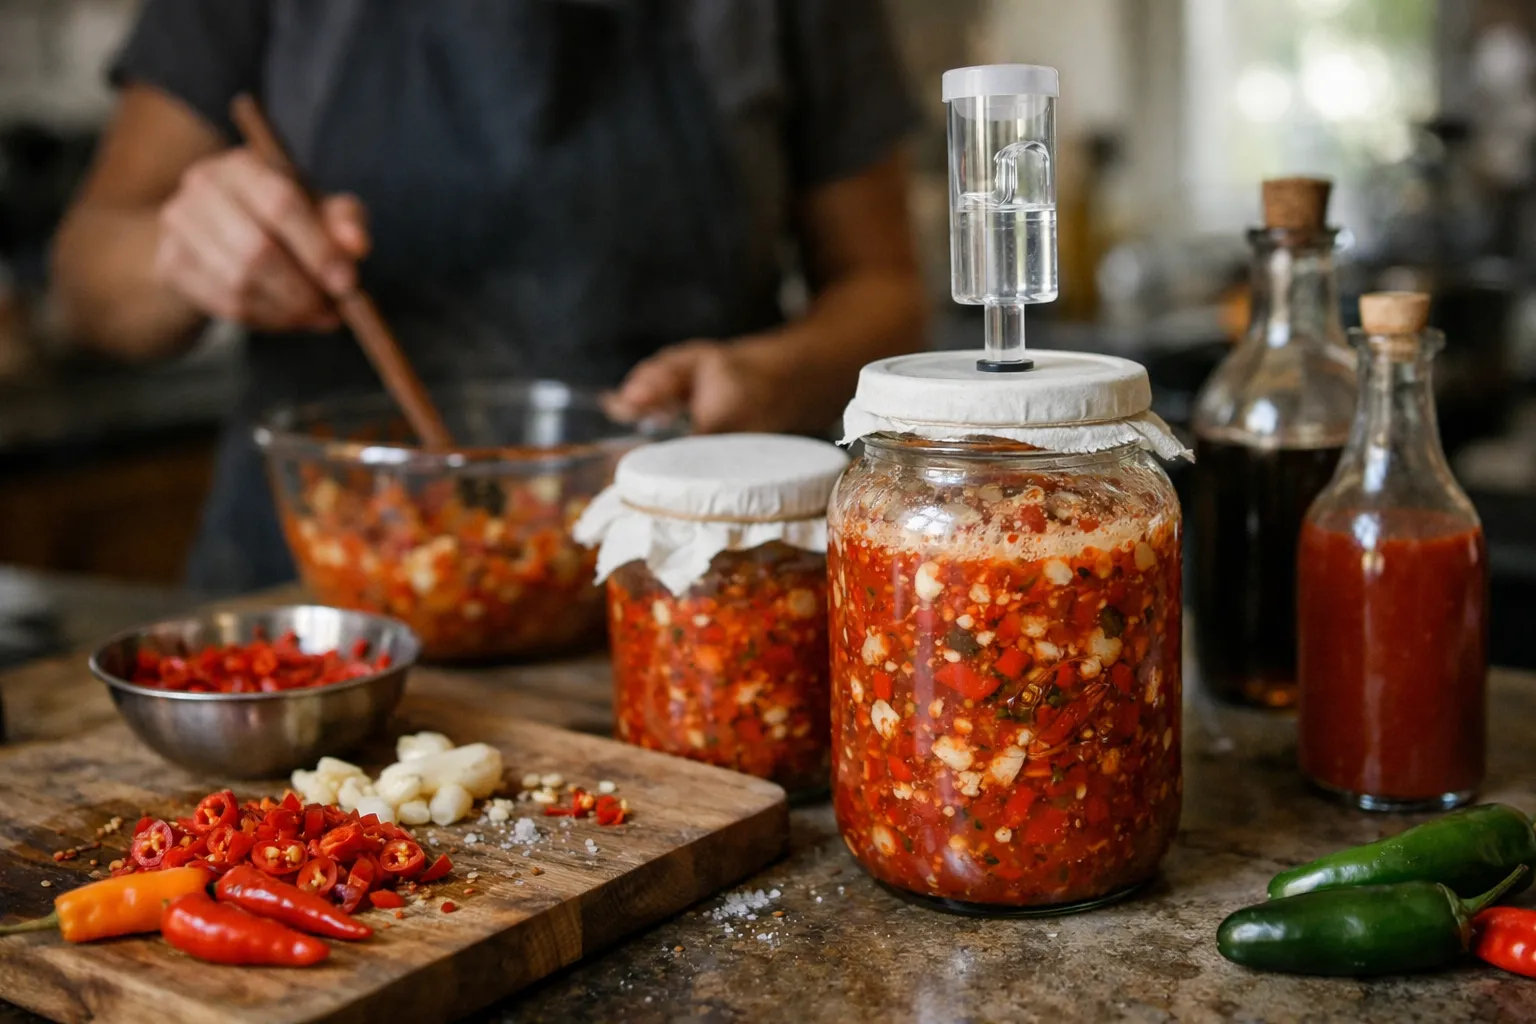
This updated Quick Bites Kitchen guide brings the original 7-day fermented hot sauce method current for September 2026. If you’re a home cook who already ferments or someone trying it for the first time, this article explains what to buy, why each step matters, how to use modern tools (digital pH meters, temperature-controlled fermenters), and how safety guidance and consumer trends through 2026 change best practices. You’ll get an actionable step-by-step method, troubleshooting, scaling math, and flavor ideas so you can reliably make a bright, tangy hot sauce in roughly a week.
Prerequisites and context: what to know first
Fermentation converts sugars in peppers and vegetables into lactic acid via lactic acid bacteria (LAB). That acid—and correct salt and temperature—makes the final product safe and shelf-stable when handled correctly. Key principles remain unchanged in 2026:
- Salt concentration (by weight) controls microbial selection and texture—2% of total solids is a reliable home-brewer baseline.
- Acidity (measured as pH) determines safety from spore-forming hazards; home cooks must measure pH of the finished sauce.
- Temperature controls speed and flavor: lower in the 65–70°F (18–21°C) band yields steady lactic fermentation; hotter conditions speed fermentation but can blunt texture and create off-flavors.
What’s new in 2026: compact, affordable temperature-controlled fermenters and better consumer digital pH tools are widely available, making home control easier. Public health agencies continue to stress the same pH thresholds—measure, don’t guess—and advise immunocompromised people and infants' caregivers to consult a clinician before consuming home-fermented products with live cultures.
Essential ingredients and equipment (updated)
Ingredients (Basic 1‑pound batch)
- 1 lb fresh peppers (e.g., Fresno, serrano, jalapeño, habanero, scotch bonnet or a mix). Remove stems; keep seeds for heat or remove for milder sauce.
- 1–2 garlic cloves (optional)
- 2% salt by weight of total solids (see step below). Example: 450 g solids → 9 g salt.
- Filtered water (only if you make a brine to cover solids)
- Optional: 1 small carrot or 1/4 onion for sweetness and body
- Optional finish: 1–2 tbsp distilled or apple cider vinegar to adjust final acidity and flavor
Updated equipment
- Kitchen scale (grams) — indispensable for accurate salt percentages.
- Digital pH meter (consumer grade) — choose one with replaceable probes and two-point calibration capability; aim for ±0.1 pH accuracy.
- Calibration buffers (pH 4.01 and 7.00) — calibrate before use and every week if used often.
- Fermentation jar (wide-mouth Mason jar) and a fermentation weight or small zip-top bag of brine to keep solids submerged.
- Airlock lid or a jar lid left loose—avoid sealed lids that can pop or explode from CO₂.
- Blender or immersion blender and a fine sieve if you prefer a smooth texture.
- Optional but helpful in 2026: countertop temperature-controlled fermenter or a temperature-controlled box (helps especially in hot or cold climates), and a thermometer probe.
Step-by-step method (clear, numbered)
-
Choose and prepare peppers (10–15 min):
Wash peppers. Remove stems; seeds are optional. Roughly chop into pieces that will pack evenly in your jar. If you add a carrot, onion, or garlic, chop them similarly. Why: uniform pieces pack more consistently and ferment at a predictable rate.
-
Weigh solids and calculate salt (5–10 min):
Weigh the total solids (peppers + any garlic/onion/carrot) in grams. Multiply that weight by 0.02 to get 2% salt by weight. Example: 450 g solids × 0.02 = 9 g salt. Why: salt at 2% suppresses unwanted bacteria while letting LAB work; measuring by weight is far more reliable than "a pinch."
-
Mix salt into the solids (2–3 min):
Combine salt and chopped solids in a bowl and massage lightly until they release juices. Reason: this helps draw liquid to cover solids without needing much added water, keeping the ferment brine concentrated enough to discourage spoilage.
-
Pack and weigh down (5 min):
Firmly pack the salted solids into the jar, compressing to release air pockets. If liquid is insufficient to cover solids, add a small amount of filtered water or make a 2–3% brine (20–30 g salt per liter of water) to top the jar. Ensure all solids are submerged beneath brine and use a weight to hold them down. Why: submerged anaerobic conditions favor lactic acid bacteria and reduce surface spoilage.
-
Ferment at controlled temperature (3–7 days at 65–75°F / 18–24°C):
Place jar in a stable spot out of direct sunlight. Use a temperature-controlled fermenter or a cool cupboard if your kitchen fluctuates. Check daily: you should see bubbles; release gas if using a lid without an airlock. If a white film (kahm yeast) forms, skim it off; if you see fuzzy, colored mold, discard the batch (see troubleshooting). Taste beginning day 3. Aim to proceed when the flavor is bright, tangy, and pepper-forward—often day 5–7 in moderate temperatures.
-
Blend and measure pH (10–15 min):
Pour solids and brine into a blender. Add a splash (1 tbsp) of vinegar if you want to stabilize flavor and lower pH. Blend to your preferred texture. Use your calibrated digital pH meter to measure the finished sauce (not just the brine): dip the probe in the blended sauce and record pH. Why: finished-sauce pH determines safety for unrefrigerated storage and informs whether to add vinegar or continue fermenting.
-
Adjust, finish, and store:
If the pH is above 4.6, continue fermenting or add acid (distilled vinegar) in small increments and re-check until you reach at least pH ≤4.6; many home fermenters prefer 3.0–3.8 for flavor. To stop further fermentation and retain a stable flavor, briefly heat the sauce to a simmer for 1–2 minutes, cool, and bottle; this pasteurization removes live cultures but extends shelf life. Refrigerate unheated sauce—refrigeration slows but does not stop fermentation. Why: measuring pH and deciding whether to pasteurize are the final safety and shelf-life controls.
Updated safety guidance (2026 practical points)
- pH is the single best safety measurement: For home-fermented sauce stored refrigerated, pH 4.6 is considered safe against botulism risk. For shelf-stable distribution you will need more stringent controls and likely additional acidification and processing—consult local food-safety authorities before selling.
- Measure finished sauce pH: Take at least two readings at different parts of the batch and average them. Calibrate your meter before each session with pH 7 and pH 4 buffers.
- Salt: 2% remains the recommended home baseline: Reducing salt increases spoilage risk. If you want lower sodium, ferment at 2% then dilute/pasteurize after blending to reduce sodium per serving.
- People to advise caution: Infants under 12 months, pregnant people, and immunocompromised individuals should consult a clinician before eating raw ferments with live cultures.
- Climate considerations: Warmer summer temperatures (which have trended higher in many regions) accelerate fermentation—taste earlier and move to cooler storage to avoid over-fermentation.
Scaling math and yield (practical examples)
- Salt = 2% of total solids. Example: 2 kg peppers → 40 g salt.
- Yield: 1 lb (≈450 g) raw peppers typically produces ~1 to 1.5 cups finished sauce (8–12 oz). With a 1 tsp serving size (~5 g), expect ~32–48 servings per batch.
- Scaling is linear for ingredients; salt must be recalculated by weight. For larger batches use larger fermenting vessels and multiple weights to keep solids submerged.
Flavor variations and 2026 trends
Home fermenters are combining global flavor influences and using hybrid techniques (ferment then char, ferment with fruit, or ferment under controlled temperature). Examples to try:
- Caribbean-style: Scotch bonnet + pineapple (use the fruit sparingly to avoid accelerating fermentation) + 2% salt. Ferment 5–7 days, blend, optionally finish with 1 tbsp white vinegar for brightness.
- Aji amarillo & citrus: Aji amarillo + 1 small roasted carrot + garlic. Ferment 6–8 days for deeper fruity notes; add lime zest after blending.
- Smoky-fermented: Ferment jalapeños 5–7 days, then briefly char under a broiler before blending for a smoky edge without losing fermented depth.
- Umami-forward: Add 1–2 tbsp miso after blending (do not add miso before fermenting unless you account for its cultures and salt).
Common mistakes and how to avoid them
- Not weighing ingredients: Guessing salt invites inconsistent fermentation. Weigh solids and salt every batch.
- Failing to measure pH: Don’t rely on taste alone. A digital pH reading of the finished sauce is essential.
- Ignoring temperature: If your kitchen routinely hits >75°F, move jars to a cooler spot or use a temperature-controlled unit to avoid rapid, soft fermentation.
- Sealing jars tightly: Ferments release CO₂—use airlocks or leave lids slightly loose to prevent pressure buildup and jar breakage.
Pro tips (advanced)
- Calibrate your pH meter before every batch and store its probe per manufacturer instructions to extend life and accuracy.
- Take pH readings of the blended sauce rather than just the brine; acid distribution can shift after blending.
- For consistent results across seasons, control temperature rather than time—fermentation at 68–72°F will produce similar outcomes regardless of external climate.
- If you want live-culture sauces but longer refrigerator stability, refrigerate promptly at pH 4.6 and consume within 3–6 months; pasteurize if you want longer refrigerator shelf life without active cultures.
Troubleshooting common issues
- Fuzzy, colored mold: Discard the batch, clean all equipment in hot soapy water and sanitize; review submersion and salt for next batch.
- White kahm yeast: Harmless surface yeast—skim it off, taste; continue if flavor is normal.
- Off-putting rotten smell: Not a lactic tang—discard batch. Review hygiene and salt calculations.
- pH too high (>4.6): Continue fermenting and re-test daily or add measured vinegar (1 tbsp at a time) and re-check pH until safe.
Storage and shelf life (updated)
- Refrigeration: Unheated fermented hot sauce, pH ≤4.6, keeps 3–6 months in the fridge; flavor will continue evolving.
- Pasteurization: Briefly simmering (1–2 minutes) after blending and bottling hot will halt fermentation and extend shelf life, at the cost of live cultures and some fresh vibrancy.
- Freezing: Freeze in ice-cube trays for single servings; thawed sauce may separate—whisk or blend before use.
Basic 7-Day Fermented Hot Sauce recipe (updated, yields ~1 cup)
- Ingredients: 1 lb mixed chilies (Fresno + serrano), 1 small carrot, 2 garlic cloves, 9 g kosher or pickling salt (2% of ~450 g solids), filtered water only if needed to cover, 1 tbsp apple cider vinegar (optional)
- Method: Weigh and salt solids to 2%; pack into a wide-mouth jar so solids are submerged; ferment at 68–72°F for ~5–7 days, blending when the taste is pleasantly tangy. Measure finished-sauce pH—aim 4.6 and typically 3.0–3.8 for bright flavor. Pasteurize if you want stable, culture-free sauce.
- Serving size: 1 tsp (~5 g); batch yields ~32–48 servings depending on final consistency.
Putting it on the table
Fermented hot sauce brightens fatty and fried foods, and now more home cooks are pairing them with grain bowls, plant-based proteins, and cocktails (a spicy shrub addition). For guests sensitive to live cultures, temper sauce into mayonnaise or yogurt—note this will change shelf life.
Final Quick Bites Kitchen tips
- Weigh and measure—consistency comes from precise salt and pH checks.
- Start small and iterate—label jars with date, temperature, and pepper types.
- Use modern tools: a calibrated pH meter and a controlled-temperature fermenter remove much of the guesswork.
- If you plan to sell fermented sauce, consult food-safety regulators and consider working with a food scientist to validate processes.
FAQ
Do I have to pasteurize my fermented hot sauce?
No—pasteurization is optional. Refrigerated, an unpasteurized sauce with pH ≤4.6 can be stored for several months, but live cultures will continue to evolve the flavor. Pasteurize (brief simmer) to stop fermentation, extend shelf life, and remove live cultures if you prefer a stable product.
How do I know my pH meter is accurate?
Calibrate the meter before each use with at least two standard buffers (pH 7.00 and pH 4.01). Rinse the probe between readings, and store the probe according to the manufacturer’s instructions. If readings drift or jump by >0.1 pH between calibrations, replace the probe or meter.
Can I reduce salt below 2% for a low-sodium sauce?
Reducing salt below 2% increases the risk of spoilage and off-flavors. If you want lower-sodium results, ferment at 2% for safety and then dilute or pasteurize after blending to reduce salt per serving; always test pH after any dilution.
Is fermented hot sauce probiotic?
Fermented hot sauce can contain live lactic acid bacteria, but probiotic benefits depend on strains, viability at consumption, and survival through the gut. People seeking documented probiotic effects should consult clinical sources; fermented sauces are best thought of as flavorful fermented foods rather than guaranteed probiotic supplements.
Can I use fruit in my ferment?
Yes—fruit (pineapple, mango) adds sugars and flavor but can speed fermentation. Use fruit sparingly, monitor temperature closely, and taste earlier. If you add high-sugar fruit at scale, consider shorter ferment times and more frequent pH checks.