
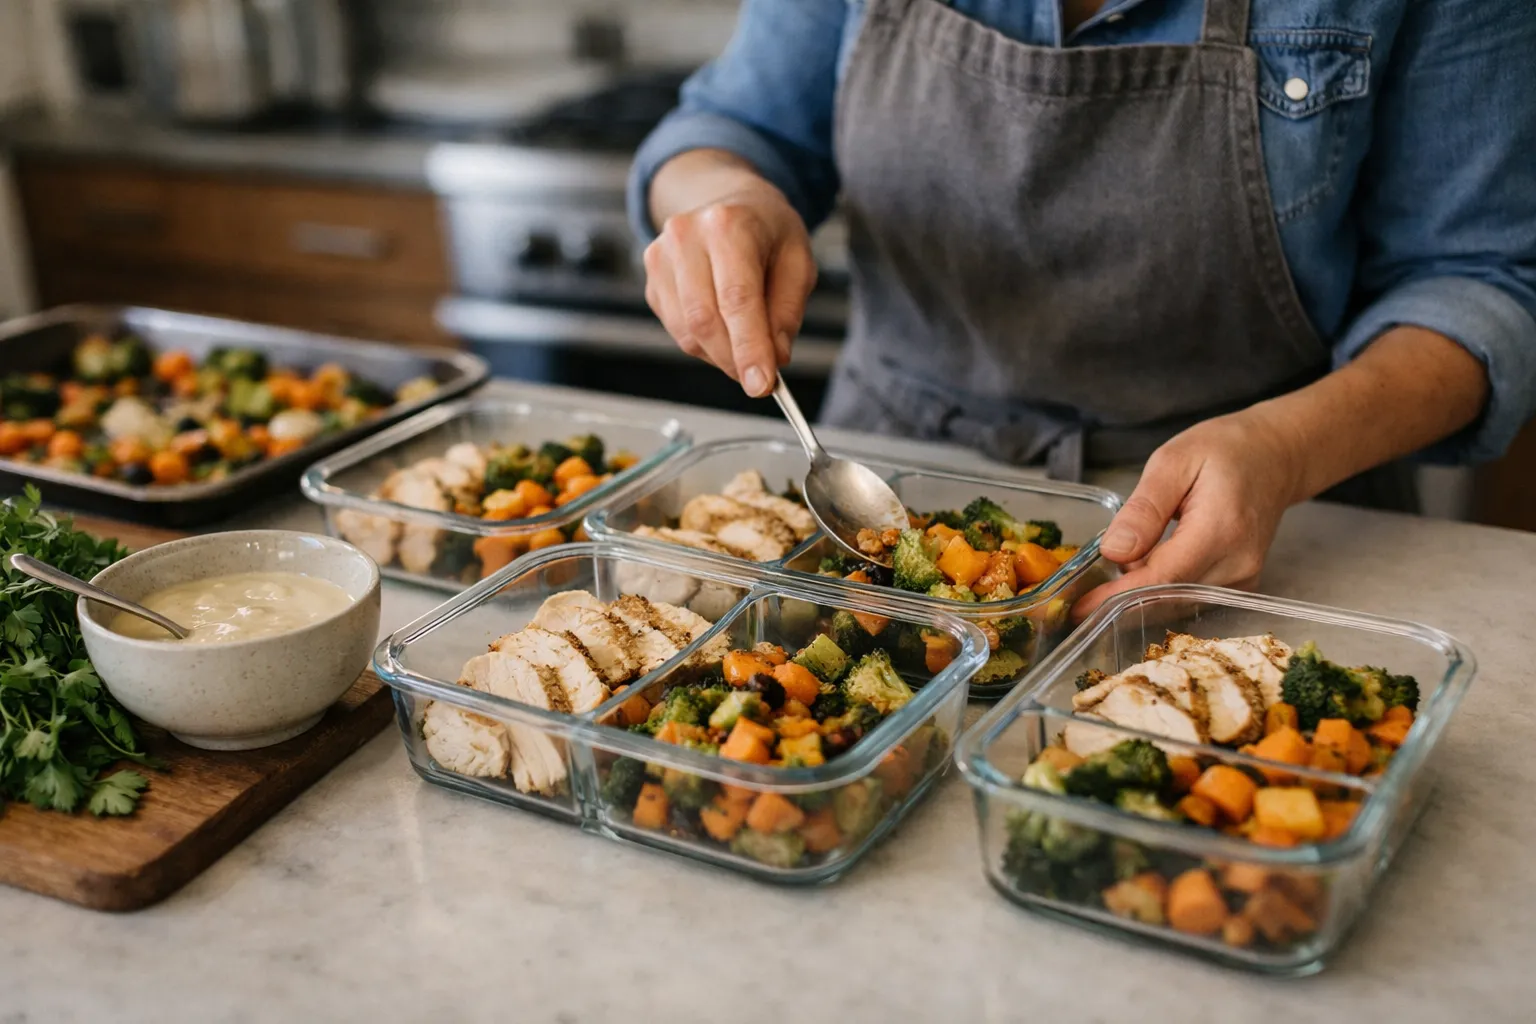
Who this guide is for: home cooks who want restaurant-quality weeknight meals without repetition, readers who use (or are curious about) modern kitchen tech—smart fridges, combi ovens, vacuum sealers—and anyone who prefers flexibility over identical meal boxes.
What you'll learn: an updated component-based mix-and-match meal-prep workflow tuned for August 2026 kitchens. You'll get a practical sequencing plan, appliance-focused tips (smart ovens, combi/air ovens, rapid-chill drawers), storage and reheating best practices, and updated examples so your prep stays fresh through the week.
Why this matters now: many households in 2026 are balancing tighter budgets and grocery volatility with wider access to countertop appliances and smart-kitchen features. Component-based prep reduces waste, increases variety, and works with smart inventory tools and precision reheating to keep meals tasting as they should. I test these strategies in my kitchen—grown from lessons my grandmother taught me—and they save time without sacrificing flavor.
Prerequisites and context: what “mix-and-match” meal prep is in 2026
If your idea of meal prep is five identical containers, this method will free you. Mix-and-match means prepping building blocks—1–2 proteins, a grain or starch, a roasted veg tray, a fresh crunch, and a “flavor engine” sauce—that recombine into bowls, wraps, salads, and fast skillet dinners across the week.
The core components:
- Protein: 1–2 options (one oven-roasted or braised, one fast/no-cook)
- Vegetables: at least one roasted and one fresh/crunchy
- Starch: neutral base (rice, farro, potatoes, noodles, tortillas, or cauliflower rice)
- Sauce/Flavor engine: 1–2 versatile sauces (acid-forward ones travel best)
- Finishers: herbs, citrus, pickles, seeds, cheese
Essential equipment for 2026 kitchens: a sheet pan and heavy skillet, a 6–10 qt pot for grains, an instant-read thermometer (still essential), and 6–10 airtight containers. Optional but high-value additions: a countertop combi oven or air-oven with humidity settings, a chamber vacuum sealer (better for wet/briny components than edge-sealers), a rapid-chill drawer or smart fridge with quick-chill mode, and an immersion circulator (sous-vide) for precise proteins.
Food safety baseline: USDA guidance remains: refrigerate cooked foods promptly and get perishables below 40°F (4°C) quickly; avoid leaving food in the 40°F–140°F “danger zone” for more than two hours. For best results, cool cooked items in shallow containers and label with dates.
Step 1: Choose a weekly “theme” (keeps prep cohesive)
A theme cuts decision fatigue while ensuring your sauces and finishers work across multiple plates. You’re not locked into a cuisine—pick a flavor direction so elements pair easily.
- Pick a primary flavor profile: Mediterranean, Mexican, Korean-ish, Southeast Asian, or “Comfort + Bright.”
- Choose one wildcard: a preserved item (quick-pickles, fermented hot sauce), a contrasting sauce, or a bold finishing element like preserved lemon or smoked chili oil. 3. Plan for 3–4 dinners plus lunches: assume one night out or a midweek refresh; stretching five full dinners without a refresh risks quality loss.
Updated sample theme for Aug 2026: “Herby Mediterranean + Smoky Heat.” Roasted paprika chickpeas, lemon-herb freekeh (or farro), charred broccolini, a yogurt-tahini with smoked paprika, and a jar of quick-pickled peppers. This leans on pantry staples and a single smoky ingredient (smoked paprika or a chili oil) that ties dishes together.
Step 2: Build your component plan—repeatable and tech-aware
Use this simple template and swap items weekly. In 2026, think about how each component stores and reheats with your appliances.
- Protein 1 (main): something that reheats well—roasted chicken thighs, sous-vide pork shoulder (finished in hot oven or air-oven), baked tofu, or sheet-pan salmon. If using a sous-vide, vacuum-seal post-cook for longevity.
- Protein 2 (fast): quick options—canned tuna, smoked salmon, hard-boiled eggs (cook in smart multicooker), or a blitzed lentil salad.
- Starch: neutral base—brown rice, farro, roasted sweet potatoes, par-cooked frozen rice, or noodles. Par-cooked frozen grains are now widely available and freeze-thaw reliably.
- Roasted veg: one or two vegetables roasted together—carrots + Brussels sprouts, eggplant + cherry tomatoes, or broccolini + red onion.
- Fresh/crunchy veg: cabbage slaw, cucumber salad, fennel, or quick-pickled onions.
- Sauce/flavor engine: one all-purpose sauce—yogurt-tahini, chimichurri, gochujang-yogurt, peanut-lime. Acid-forward sauces help components feel bright later in the week.
Why this updated template works: in 2026, more home cooks use app-connected thermometers and smart ovens with humidity control; planning components that reheat well in those devices preserves texture and reduces active time.
Step 3: Shop strategically (function-first, minimize waste)
Think function, not recipes. That means buying items that fill roles and withstand schedule changes.
- Make a “function-first” list: protein, starch, roast veg, fresh veg, sauce staples, finishers.
- Buy resilient produce: cabbage, carrots, onions, lemons, potatoes—these store well if plans shift.
- Use tech to speed shopping: if you have a smart-fridge inventory or pantry app, sync it to avoid duplicates. Many apps can suggest swaps when an ingredient is out.
- Choose one convenience item deliberately: par-cooked grains, a rotisserie chicken, or portioned frozen fish—these save time and reduce waste.
Practical substitutions: no eggplant? Roast zucchini or mushrooms. No tahini? use a yogurt or peanut base. Frozen fish often offers better value than inconsistent fresh shelves and sears well from partially thawed.
Step 4: Do a 90–120 minute prep session (order matters)
Sequence to use passive cooking time efficiently. With smart appliances, you can stagger jobs and monitor with apps.
- Preheat and set stations: Preheat oven to 425°F (220°C) or set combi oven program. Lay out knives, containers, towels, and a cooling rack for proteins.
- Start the starch: Cook grains on the stove or in an Instant Pot. Par-cooked frozen rice can go into a warming drawer or quickly reheat later.
- Prep and roast vegetables: Toss on sheet pans with oil and salt; roast at high heat for color. If using an air-oven, use a single sheet pan and a shorter cook time—check for caramelization.
- Cook the main protein: Roast, sous-vide, or sear. Use a probe thermometer with app alerts to pull proteins at target temps. For poultry, pull at 160–163°F to account for carryover to 165°F; for pork, aim for 145°F with a short rest.
- Make the sauce: Most sauces take 5–10 minutes. Taste and adjust—bright acid and salt hold up through several days.
- Prep fresh items last: Slice cabbage, herbs, and cucumbers last so they stay crisp; start quick-pickles earlier because they improve after 30–60 minutes.
- Cool and store properly: Portion into shallow containers, vent steam briefly, label with date, and use rapid-chill if you have it. If you have a rapid-chill drawer or a smart-fridge quick-chill, use it for proteins and grains to slow bacterial growth and preserve texture.
Look-fors: roasted veg should have browned edges and visible caramelization; proteins should show a good Maillard crust and read accurately with a thermometer. Sauce should feel one notch brighter than you want on day-of—sauces dull slightly after refrigeration.
Step 5: Store components so they last (and still taste good)
Smart storage preserves both safety and quality. In 2026, many households combine traditional methods with new tools—vacuum sealing, smart-chest freezers, and chilled drawers.
- Store sauce separately: protects greens and maintains flexibility.
- Keep crunchy items dry: folded paper towel or breathable container keeps slaws crisp.
- Label clearly: write prep date and a “use-by” date—3–4 days is a useful rule for most cooked components.
- Vacuum sealing: chamber vacuum sealers handle briny and sauced items better than edge-sealers. Vacuum-sealed proteins and grains freeze well for 6–12 weeks; thaw in a cold water bath or reheat sous-vide.
- Freeze strategically: freeze portions you don’t expect to use by day 3. Roasted veg is fine frozen for soups and stews rather than eating as-is.
- Use smart-fridge features: quick-chill to get hot food under 40°F faster; camera inventory to remind you what’s left midweek; app alerts for expiring items.
Quality window: most cooked components are best for 3–4 days in the fridge. Plan a midweek refresh—steam greens, make a new sauce, or cook a second small protein Wednesday—to extend variety and freshness.
Step 6: Assemble 5 different meals from the same prep (10 minutes each)
Change form, temperature, and finishers to make components feel new.
- Warm grain bowl: reheat farro, top with sliced chicken, roasted broccolini, drizzle yogurt-tahini, finish with lemon zest and toasted seeds.
- Charred-flatbread wrap: warm flatbread in a hot skillet or combi oven, smear sauce, add chopped roasted veg, slaw, and sliced protein; fold and press briefly.
- Fresh crunchy salad: raw greens, chilled chickpeas, handful of roasted veg, a dollop of sauce on the side, and a bright squeeze of lemon.
- Skillet refresh: heat oil, add chopped roasted veg and cold rice, stir-fry to re-crisp, toss in diced protein to warm through and finish with pickled chilies.
- Comfort bake: pile grains, top with protein and veg, scatter cheese or compound butter, and finish under a broiler or in the air-oven to crisp edges.
Common mistakes (and how to avoid them)
- Over-prepping delicate produce: don’t slice avocados or dress salads until just before eating. Keep herbs whole and chop at serving for brighter flavor.
- One-note flavors: if everything is roasted + creamy, add acid (vinegar, citrus), heat (chili flakes), or texture (toasted seeds) to diversify plates.
- Crowding pans: crowded vegetables steam. Use multiple pans or roast in batches so edges brown.
- Sealing hot food: trapless steam causes sogginess. Let foods cool slightly (30–60 minutes at room temperature max) before sealing containers, and then chill quickly.
- No midweek reset: quality drops after day 4—schedule a small midweek refresh to revive meals.
Pro tips (Maria’s kitchen-tested tricks)
- Don’t skip resting proteins: let roasted meats rest 5–10 minutes before slicing—juices redistribute and chilled-rested cuts reheat more gently.
- Use one bridging ingredient: lemon zest, smoked paprika, or cumin across two components makes disparate meals feel cohesive.
- Reheat smart: for crisp edges, reheat in an air fryer or hot oven at 375°F (190°C) for a few minutes; for tenderness, reheat gently in a covered skillet with a splash of water. Combi ovens with humidity control are excellent at bringing proteins back without drying them.
- Vacuum-seal wet items in a chamber sealer: it handles brined proteins and sauced grains without crushing textures and extends freezer life.
- Quick pickles are cheap flavor insurance: thin-sliced onion, vinegar, salt, and a bit of sugar improve bowls and tacos—make a jar Sunday and use through the week.
- One small “flavor cheat”: a jar of preserved lemons, a good chile crisp, or toasted nuts transforms the familiar into something you want to eat again.
FAQ
How long will prepped components keep in the fridge?
For both quality and safety, plan on 3–4 days for most cooked components. Acid-based sauces and quick-pickles often last longer (up to a week). If you need more time, vacuum-seal and freeze; most proteins and grains frozen properly keep 6–12 weeks.
Is a chamber vacuum sealer worth it for home cooks?
Yes if you prep frequently and work with brined, sauced, or liquid-containing items. Chamber sealers remove air without crushing wet foods and are superior for freezing wet proteins and cooked grains. For occasional preppers, good airtight containers plus rapid chilling will usually suffice.
Can smart-fridge features actually help meal prep?
Yes—camera inventory, expiration alerts, and quick-chill drawers are genuinely useful. They reduce duplicate purchases, speed chilling of hot containers, and remind you when components approach their quality window. They don't replace labeling and basic food safety, but they help you manage the week.
How do I keep chicken or tofu from drying when reheating?
Reheat gently: a covered skillet with a splash of water, short microwave bursts with pauses, or a brief finish in an air fryer or hot oven to restore surface texture. Slice thicker proteins after resting and reheat quickly at higher heat; add sauce after reheating to restore perceived juiciness.
What’s one small weekly habit that makes a big difference?
Make one small, bold condiment or “flavor cheat” each week—preserved lemon, a chile crisp, or a smoky spice mix. That single element will lift multiple dishes and keep the week interesting.
Source notes: Food-safety guidance aligns with USDA consumer recommendations on refrigeration. Appliance guidance reflects common capabilities of consumer combi ovens, chamber vacuum sealers, and smart-fridge features available in 2026. These practices are tested in home kitchens and recommended for reliable, flexible meal prep.
Kitchen story—my grandmother would always have one jar of something pungent—a tiny jar of preserved lemons, a handful of toasted nuts. When a meal felt ordinary, she reached for that jar. Treat one small thing as your weekly “flavor cheat,” and your mix-and-match system will never feel tired.